Pre-Lab 2: HTML & CSS & Bootstrap
(Due on Tueday, January 27th 10:00AM)
This is a long pre-lab, so make sure to set aside some time to get through it. We recommend not leaving it until the last minute to read. This lab requires reading through the sections below and then completing the required tasks that are explained in the last section.
Setup
Please add the WAVE accessibility checker extension to your Chrome or Firefox browser.
If you are using Chrome, add WAVE from the Chrome Web Store here.
If you are using Firefox, add WAVE from Mozilla Add-Ons here.
Readings
For the upcoming lab, please take a look at the following articles. You’ll be asked to answer some questions about them as part of the lab.
HTML
This pre-lab covers the basics of HTML. While some of you may already be familiar with HTML, please read the overview in preparation for completing the first lab.
HTML (HyperText Markup Language) is a language for describing web pages.
- HTML is made up of tags, which may be nested inside one another.
- HTML represents the content and organization of pages.
- HTML files rendered by a web browser are called web pages.
Below is an example of a HTML document:
Example 1<!DOCTYPE html>
<html lang="en">
<head>
<meta charset="utf-8" />
<title>Page title. Shown in tabs.</title>
</head>
<body>
<h1>Simple Page!</h1>
<p>This is a totally bare-bones page.</p>
<!-- this is a comment and is totally ignored -->
</body>
</html>
As you can see, the document consists of tags and plain text. Tags are
surrounded by angle brackets < and >.
Tags come in pairs, such as <head> and
</html>, and they are called the start tag and end
tag, respectively. The end tag should be identical to the start tag,
but with a forward slash / before the tag name. Tags
indicate the semantics of their contents. For example, the
<h1> tag indicates a level 1 header (the largest).
It's good style to write HTML indented in the manner above to make it
easier to find corresponding tag pairs, but it's not required.
Now, line by line:
- The first line is a document type (doctype) declaration. These tell the browser which variant of HTML you're using. You may see other doctypes, but we'll be using this one to declare our document is HTML5.
-
The
<html>tag defines an HTML document. It is not strictly necessary to include<html>tags, as most all web browsers will infer them if missing. -
The
<head>tag denotes an area where you provide information related to the page which is not page content. This can include any additional resources, the title of the document, encoding format, etc. As with<html>tags,<head>tags will be inferred if missing. - The example document is encoded with UTF-8 (note that no non-ASCII codepoints have been used up to this point). (If this is gibberish to you -- it's not so important, just include it. Or read: What is a character encoding?)
-
The
<title>tag sets the title of the page, which is primarily used to set the text in the tab bar. -
The
<body>tag defines the content of the page. This is where you put information you want to be visible on the page, such as text, images, etc. As with<html>tags,<body>tags will be inferred if missing. -
The
<h1>tag is for 1st header. h2-h6 tags also exist for headers of decreasing size. -
The
<p>tag denotes a paragraph, and its contents will show up on the page with a line break above and below it.
This is how Example 1 looks when rendered (notice you can only see what is in the body of the document):

Attributes
Before we learn some other common HTML tags, you should learn about
attributes. Some tags have attributes, which
provide additional information about that tag. In the
<meta> tag in Example 1, you have already seen an
example of attributes to specify which character set the document
uses. Attributes are of the form name="value", where
the value must always be enclosed in double-quotes.
<tag attribute="value" foo="bar">You will learn more about attributes as we go along.
More Common HTML Tags
Images
To insert images, you can use the <img> tag.
Example:
<img src="http://i.imgur.com/xTOON7z.png" alt="Take CS132"> <img> tags have two common attributes:
An absolute link: An image named "banner.jpg", located in the "images" directory on "www.example.com" has the URL "http://www.example.com/images/banner.jpg".
A relative link: If the document is being served on the same domain as your image, you can also use the relative locations of the image as the URL. If you had, for example, a document at http://example.com/page.html, you could link to http://example.com/pic.jpg by just specifying "pic.jpg" in the URL.
The alt attribute indicates a textual name that shows
up in the place of the image if the image cannot be displayed.
(This is especially useful for blind users as screen readers will
read out the alt attribute.)
Hyperlinks
A hyperlink (or link) is some text or an image that you can
click on to jump to another URL. These can be created with the
<a> tag.
<a href="http://cs.brown.edu/courses/cs132/">Some text displayed to represent the link</a> will look like: Some text displayed to represent the link
The <a> tag must use an
href attribute with a URL or file path (to another
html file within your file system) to indicate where the hyperlink
will direct the user. This attribute accepts the same type of
links as image hrefs: absolute or relative links.
https://developer.mozilla.org/en-US/docs/Web/HTML/Element/a has even more information about links if you’re curious.
Ordered Lists and Unordered Lists
To insert a list, use either the <ol> tag for
ordered lists, or the <ul> tag for unordered
lists. Within the <ol> and
<ul> tags you will place your list items in
<li> tags.
An ordered list:
<ol>
    <li>The first list item</li>
    <li>The second list item</li>
    <li>The third list item</li>
</ol>
will look like:
- The first list item
- The second list item
- The third list item
An unordered list:
<ul>
    <li>List item</li>
    <li>List item</li>
    <li>List item</li>
</ul>
will look like:
- List item
- List item
- List item
Tables
This is how you create a table:
<table>
   <thead>
      <tr>
         <th>AND</th>
         <th>F</th>
         <th>T</th>
      </tr>
   </thead>
   <tbody>
      <tr>
         <td>F</td>
         <td>F</td>
         <td>F</td>
      </tr>
      <tr>
         <td>T</td>
         <td>F</td>
         <td>T</td>
      </tr>
   </tbody>
</table>
While this may seem complex at first, tables follow a simple
structure. The <table> tag surrounds the entire
table. <thead> determines which row of the
table is the header while <tbody> usually
contains the table data. Any cell that you want stylized as a
header should use <th> while other cells should
use <td>.
Here’s what the above basic table would look like:
| AND | F | T |
|---|---|---|
| F | F | F |
| T | F | T |
It might not look so pleasing now, but you’ll soon learn how to stylize your html in the CSS section.
Forms
To create a form, use the <form>,
<label>, and <input> tags.
The <form> tags will surround the other tags.
<form action="myURL" method="POST">
    <label for="noodle">What is your favorite type of noodle?</label>
    <input id="noodle" type="text" required/>
    <p>Would you eat noodles every day?</p>
    <input type="radio" name="daily" value="yes" id="yes"/>
    <label for="yes">Yes, gladly!!</label>
    <input type="radio" name="daily" value="no" id="no"/>
    <label for="no">No, that’s impossible</label>
    <p></p>
    <input type="submit" value="Submit Response" />
</form>
Here is what it looks like:
This may seem like a lot, so let’s break it down:
-
The
actionattribute of the form tag will determine where the data from the form will be submitted after hitting the submit button. If unused, the data is sent to the webpage that it is currently on. After pressing submit, the user will also be redirected to this URL. -
The
methodattribute of the form tag will determine how the data from the form will be submitted. The two most common methods areGETandPOST. You will learn more about these methods later. -
The
<input>tag is an extremely versatile tag that changes based on what value thetypeattribute has. You can observe what thetextandradiotypes look like above. Other useful types includepassword, andcheckbox. Notice how input elements do not require an ending tag! https://www.w3schools.com/html/html_form_input_types.asp has a list of input types, but be aware that most input types not mentioned above are not available on all browsers or are not backwards compatible. -
The
<input>tag must always be accompanied by a<label>tag. If the<label>tags were missing, the text written would still show in the rendered result. However, this makes forms difficult to understand using screen readers. Additionally, by using the<label>tag, clicking on the text label will correspond to clicking on the input element itself. This comes in handy with small input elements, like radio buttons or checkboxes. Simply match theforattribute of the label with theidattribute of the input element. -
The
<p></p>is there simply for spacing. Another tag you could use instead is<br>, which requires no end tag. This tag will insert a single line break. -
The "Submit Response" button is actually another
<input>element! Once clicked, all of the information the user has filled in will be sent to the address specified by the form action attribute. The user is also redirected to this address by default. (Note that if you click submit in the above rendered form, the page will not redirect to "myUrl". This was done using JavaScript and will be something you will learn how to do in a later assignment.)
HTML Validation
You can (and should!) validate your HTML syntax using services like https://validator.w3.org/. Make sure to do this now with your examples!
CSS
Another major component of web pages is CSS (cascading style sheets).
CSS allows you to style your HTML and make it look however you please.
CSS is made up of a series of style declarations. They’re applied to
HTML either through a .css file linked in the head of the HTML
document, or in HTML in a <style> element. While
not recommended, you can also write CSS inline for an individual tag.
You can use any of these options as many times as you want (together or separately) in an HTML document. A style declaration has two parts: a selector (which elements to apply the properties to) and a set of properties (how they should look). For example:
p {
    background-color: black;
    color: white;
}
The p selector selects all
<p> elements (paragraphs). (There are many other
types of selectors that you can read about
here.)
background-color sets the background color of the
element. The color in the above example is specified by name. (There
are many
other ways
of specifying colors, but many work by name).
color sets the text color.
To include this style in a page, we can nest the style declarations in a style tag like this:
<!DOCTYPE html>
<html lang="en">
    <head>
        <meta charset="utf-8"/>
        <title>Page title. Shown in tabs.</title>
        <style>
            p {
                background-color: black;
                color: white;
            }
        </style>
    </head>
    <body>
        <h1>Simple Page!</h1>
        <p>This is a totally bare-bones page.</p>
    </body>
</html>
Or, if the style declarations were in another file called styles.css in the same directory as our html file (note that this is a relative link):
<!DOCTYPE html>
<html lang="en">
    <head>
        <meta charset="utf-8" />
        <title>Page title. Shown in tabs.</title>
        <link rel="stylesheet" href="styles.css" />
    </head>
    <body>
        <h1>Simple Page!</h1>
        <p>This is a totally bare-bones page.</p>
    </body>
</html>
You can also include CSS properties directly in a style attribute of an HTML element, like this:
<span style="display: none;">This text won’t show up!</span>This is not recommended, because this style will only apply to this specific element. It is much more efficient to declare styles that can be applied to your entire document, and that will make expanding and modifying your code a lot easier. Generally, it is best and cleanest to separate content (HTML) from presentation (CSS) by putting the CSS codes all in its own file (.css) and importing it into an HTML file.
IDs vs Classes
Another way to apply specific sets of css changes to different groups of elements is through the use of classes. Note the period before the class names.
.list1-class {
    background-color: black;
    color: white;
}

.list2-class {
    background-color: red;
    color: blue;
}
Any elements with this class will have the CSS applied. For example:
<ul class="list1-class">
    <li>List item</li>
    <li>List item</li>
</ul>
<ul class="list2-class">
    <li>List item</li>
    <li>List item</li>
</ul>
The results would look like this:
- List item
- List item
- List item
- List item
The first list will have a black background and white text while the second list will have a red background with blue text.
Lastly, there are also ids which are similar to classes as they can
also be used as CSS selectors.
When styling an id, the selector should be preceded by a
‘#’ instead of a ‘.’.
Here is the above list example that uses ids instead of classes. The results would look identical.
#list1-id {
    background-color: black;
    color: white;
}

#list2-id {
    background-color: red;
    color: blue;
}
<ul id="list1-id">
<li>List item</li>
<li>List item</li>
</ul>
<ul id="list2-id">
<li>List item</li>
<li>List item</li>
</ul>However, an id can only be used on a single element while classes can be shared. For more information on classes and id's, check out this link https://css-tricks.com/the-difference-between-id-and-class/.
The CSS Box Model
All HTML elements are considered as a series of nested boxes in CSS. This system allows you to have more control over the size, position, and spacing of your elements.
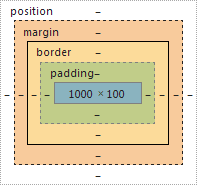
The innermost box is the content area, which contains the element’s
content (the blue box). Then, there is padding, a
property that you can use to increase the amount of space between
the edge of the element and the content inside the element. Next, is
the border property which you can use to draw a line
surrounding both the content and padding. Finally, the
margin property allows you to increase the amount of
space around the border, so you can properly space out your HTML
elements.
The big takeaway is that margin increases space outside
the border while padding increases space
inside.
Media Queries
Sometimes, you want to modify your site or app depending on a device's general type (such as speech synthesizer vs. screen) or specific characteristics and parameters (such as screen resolution or browser viewport width). In these cases, media queries come in handy.
A media query is composed of an optional media type (you
will usually be using screen) and any number of media
feature expressions. Multiple queries can be combined in various
ways by using logical operators, such as and.
@media media-type and (media-feature: condition)  {
    selector {
        property: value;
    }
}
@media screen and (max-width: 992px) and (min-width: 600px) {
h1 {
font-size: 64px;
color: blue;
}
#my-id {
display: none;
}
}
The second media query above will only apply to the
h1 tag and id when the window is wider
than 600px and shorter than 992px. If the window width does not
fulfil the specified conditions, the css inside the media query is
not applied.
More examples can be found at https://www.w3schools.com/css/css3_mediaqueries_ex.asp.
Flexboxes (Flexible Boxes)
Notice how we’ve used the css display: none; before to
hide certain elements from view. However, there are other display
modes that can help you structure your sites. One of these modes is
display: flex;. Flexboxes make it easier to design
flexible responsive layout structure.
Consider the following code:
<div class="wide flex">
    <div class="child"></div>
    <div class="child"></div>
    <div class="child"></div>
</div>
.wide {
width: 1000px;
height: 600px;
border: solid 1px red;
}
.child {
width: 200px;
height: 200px;
background-color: orange;
border: solid 1px red;
}
.flex {
display: flex;
}
This would render as:
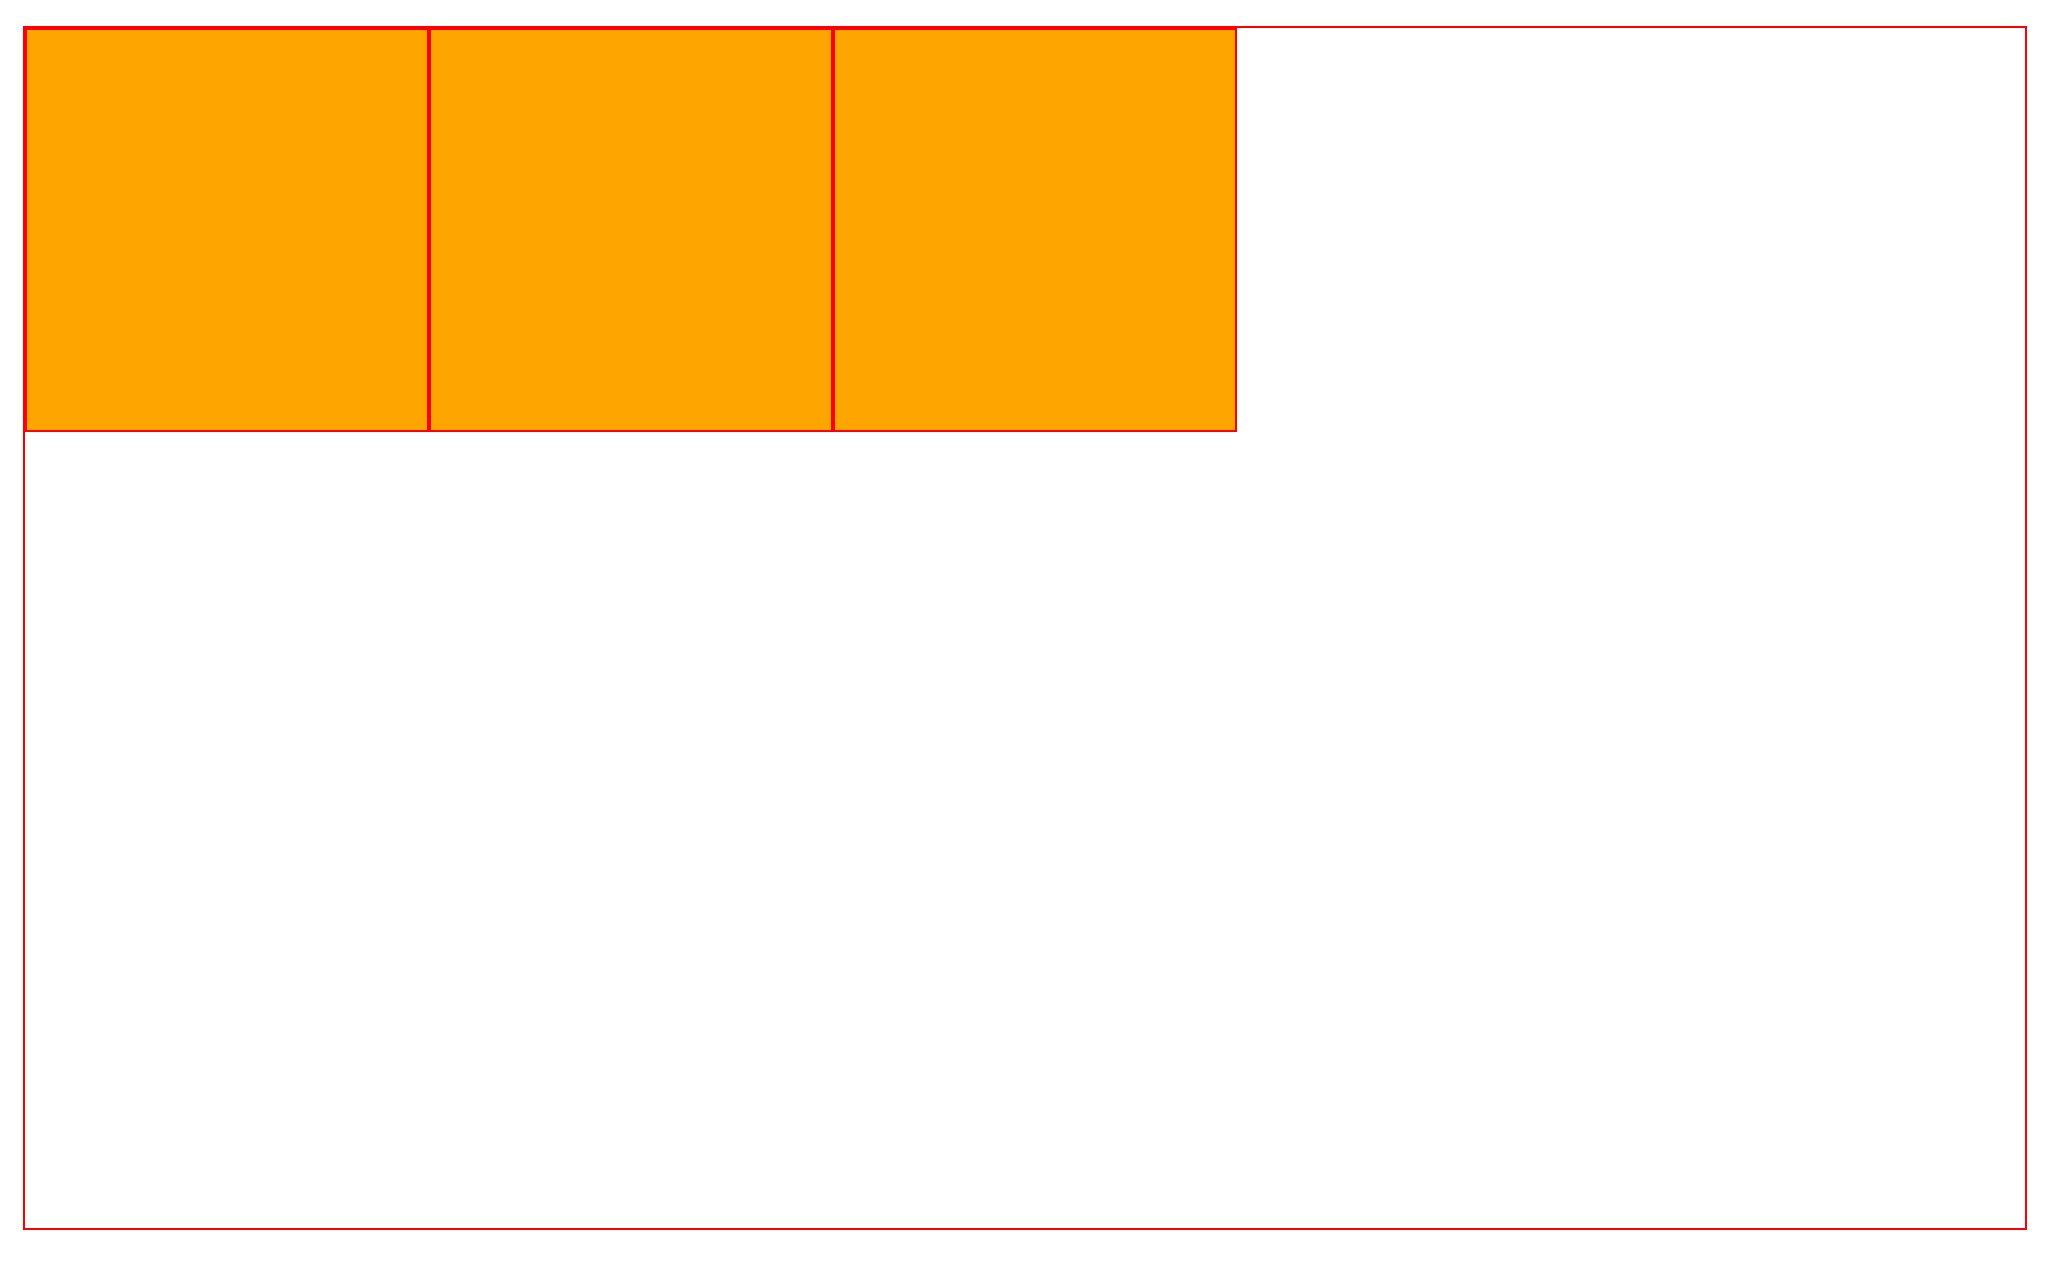
Nothing seems to be out of the ordinary! What did
display: flex; do?
display: flex; won’t have any visual properties on its
own, but allows us to utilize many other properties to manipulate
html elements as we wish.
For example, changing the flex class to:
.flex {
    display: flex;
    flex-direction: column;
}
Would change the result to:
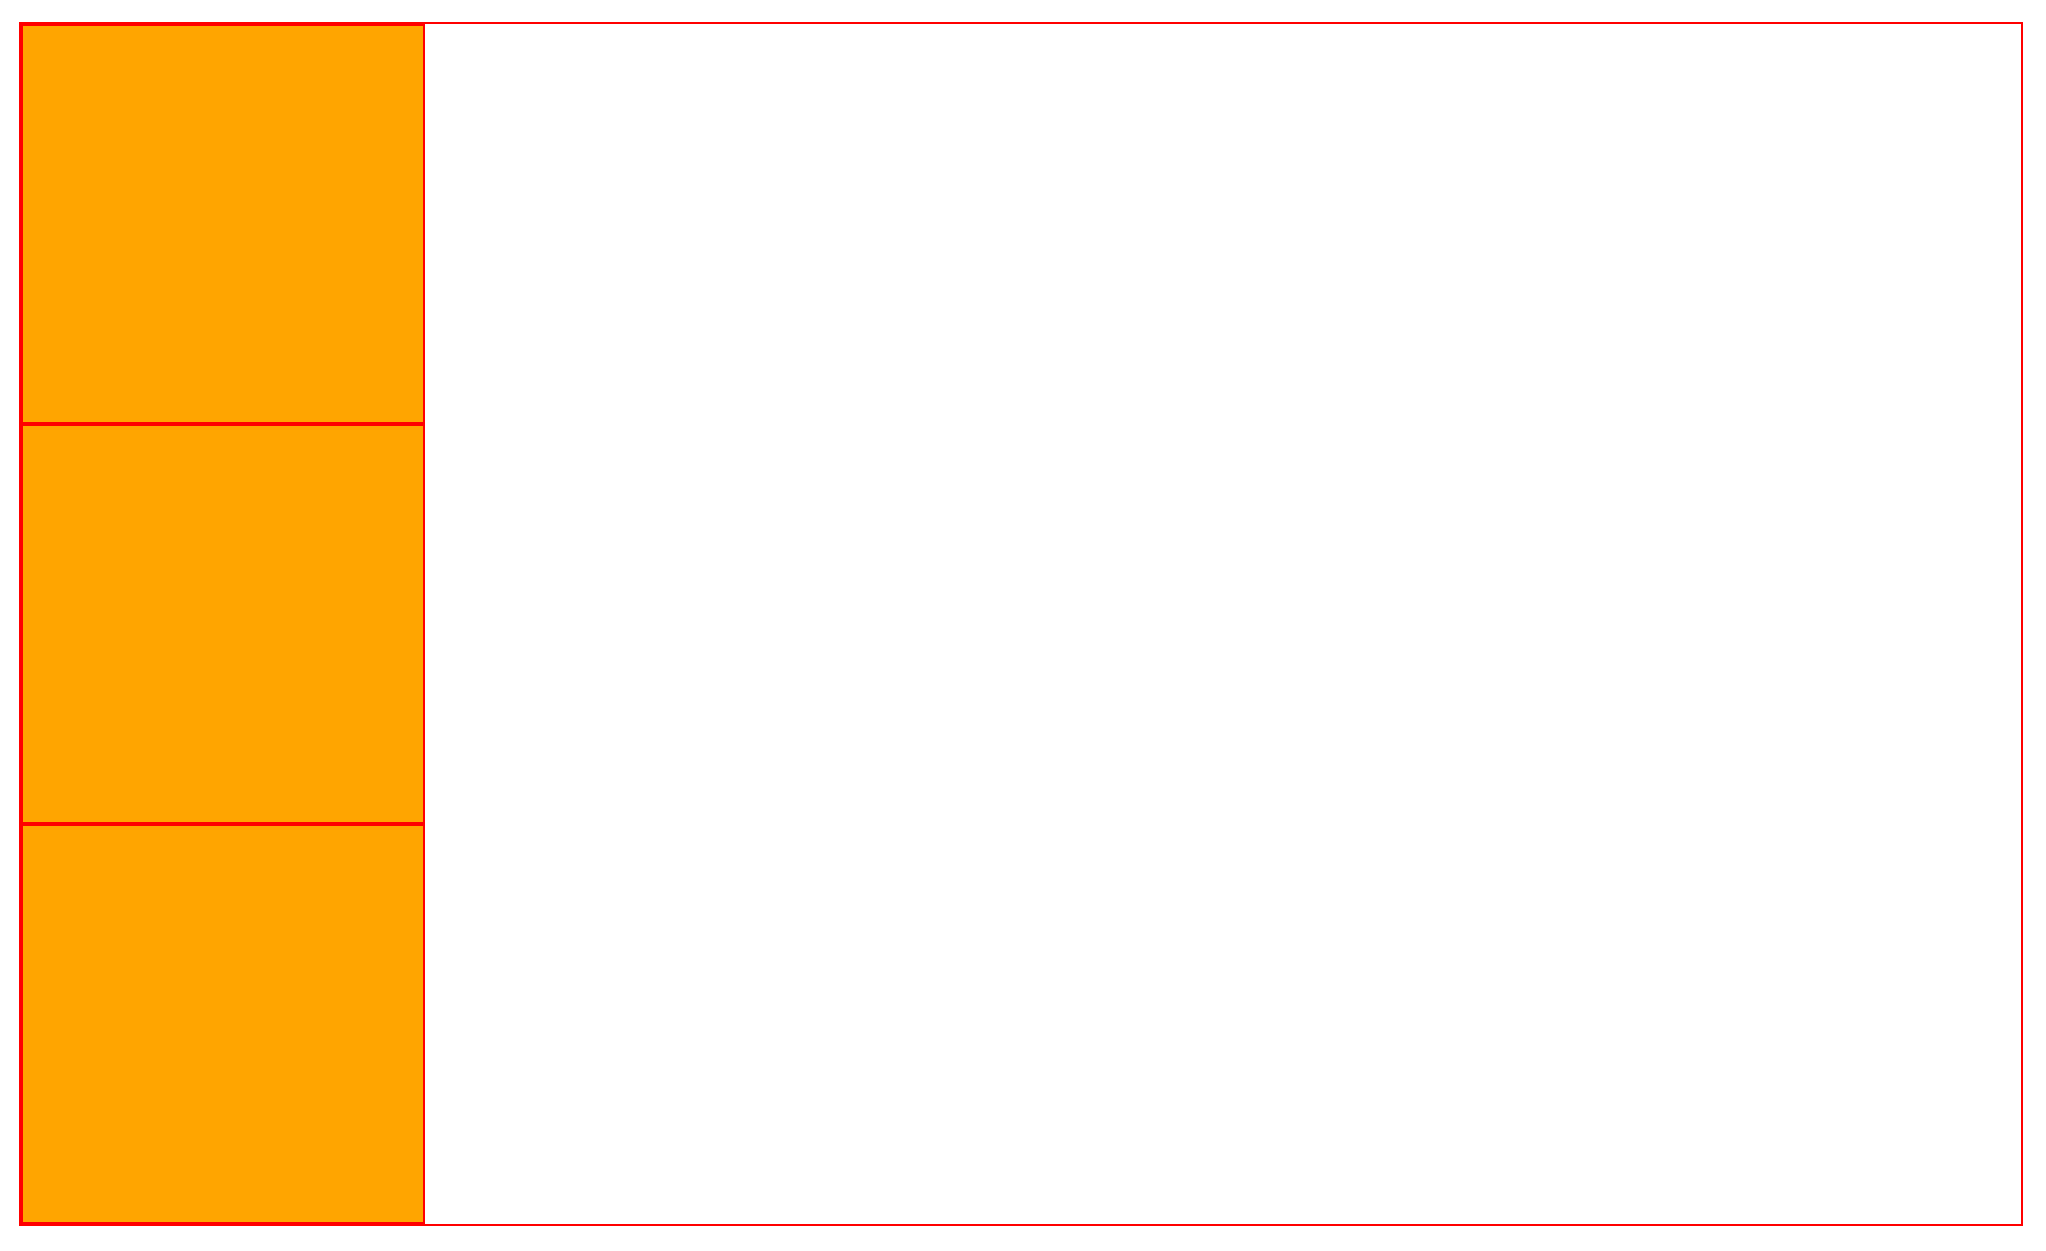
All of the children elements of our parent div are now arranged in
column order! By default, the order is
row, but can also be changed to
row-reverse and column-reverse>.
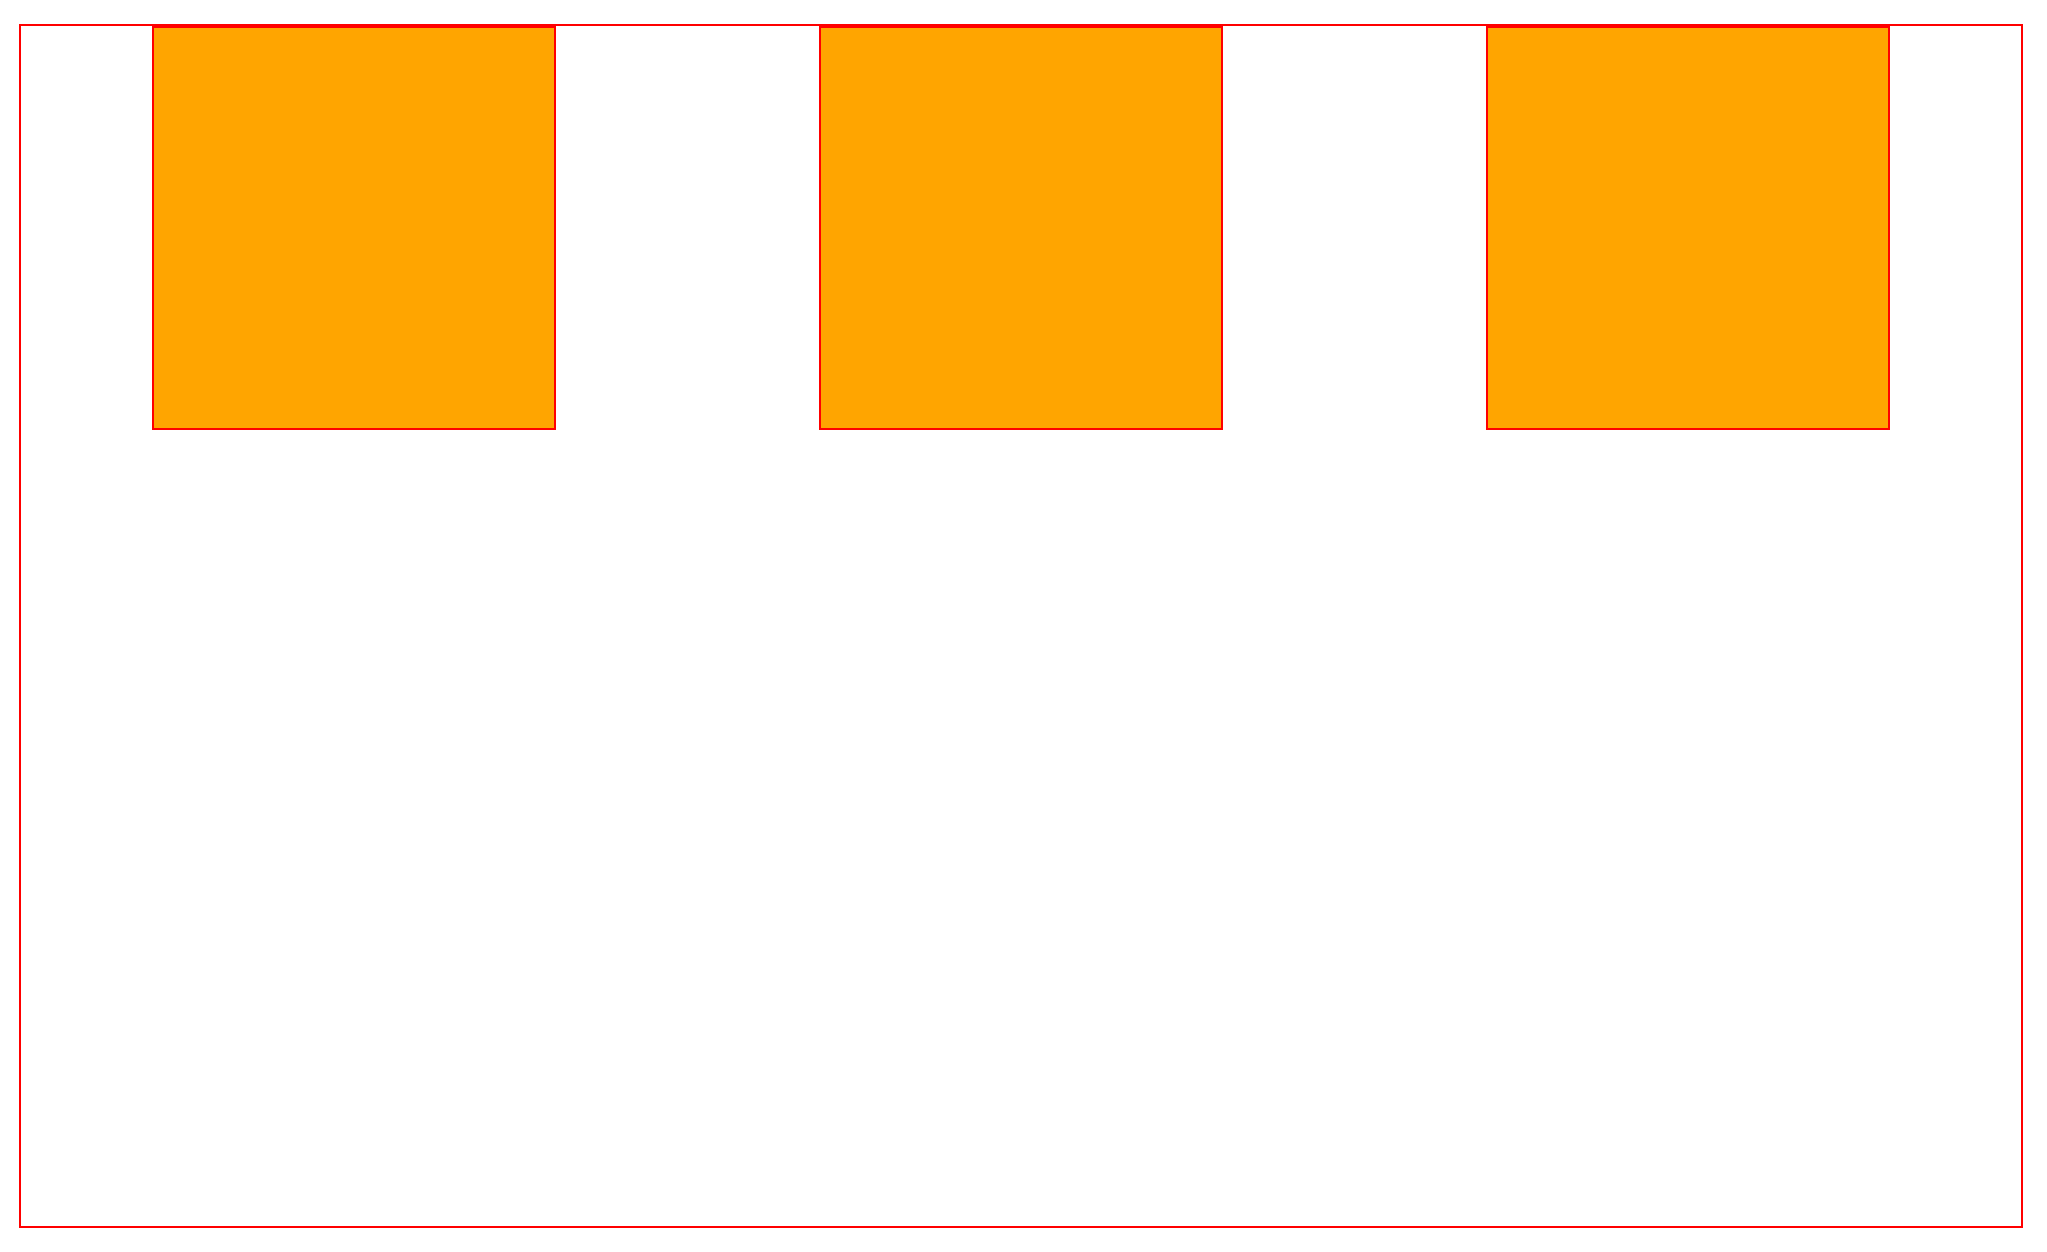
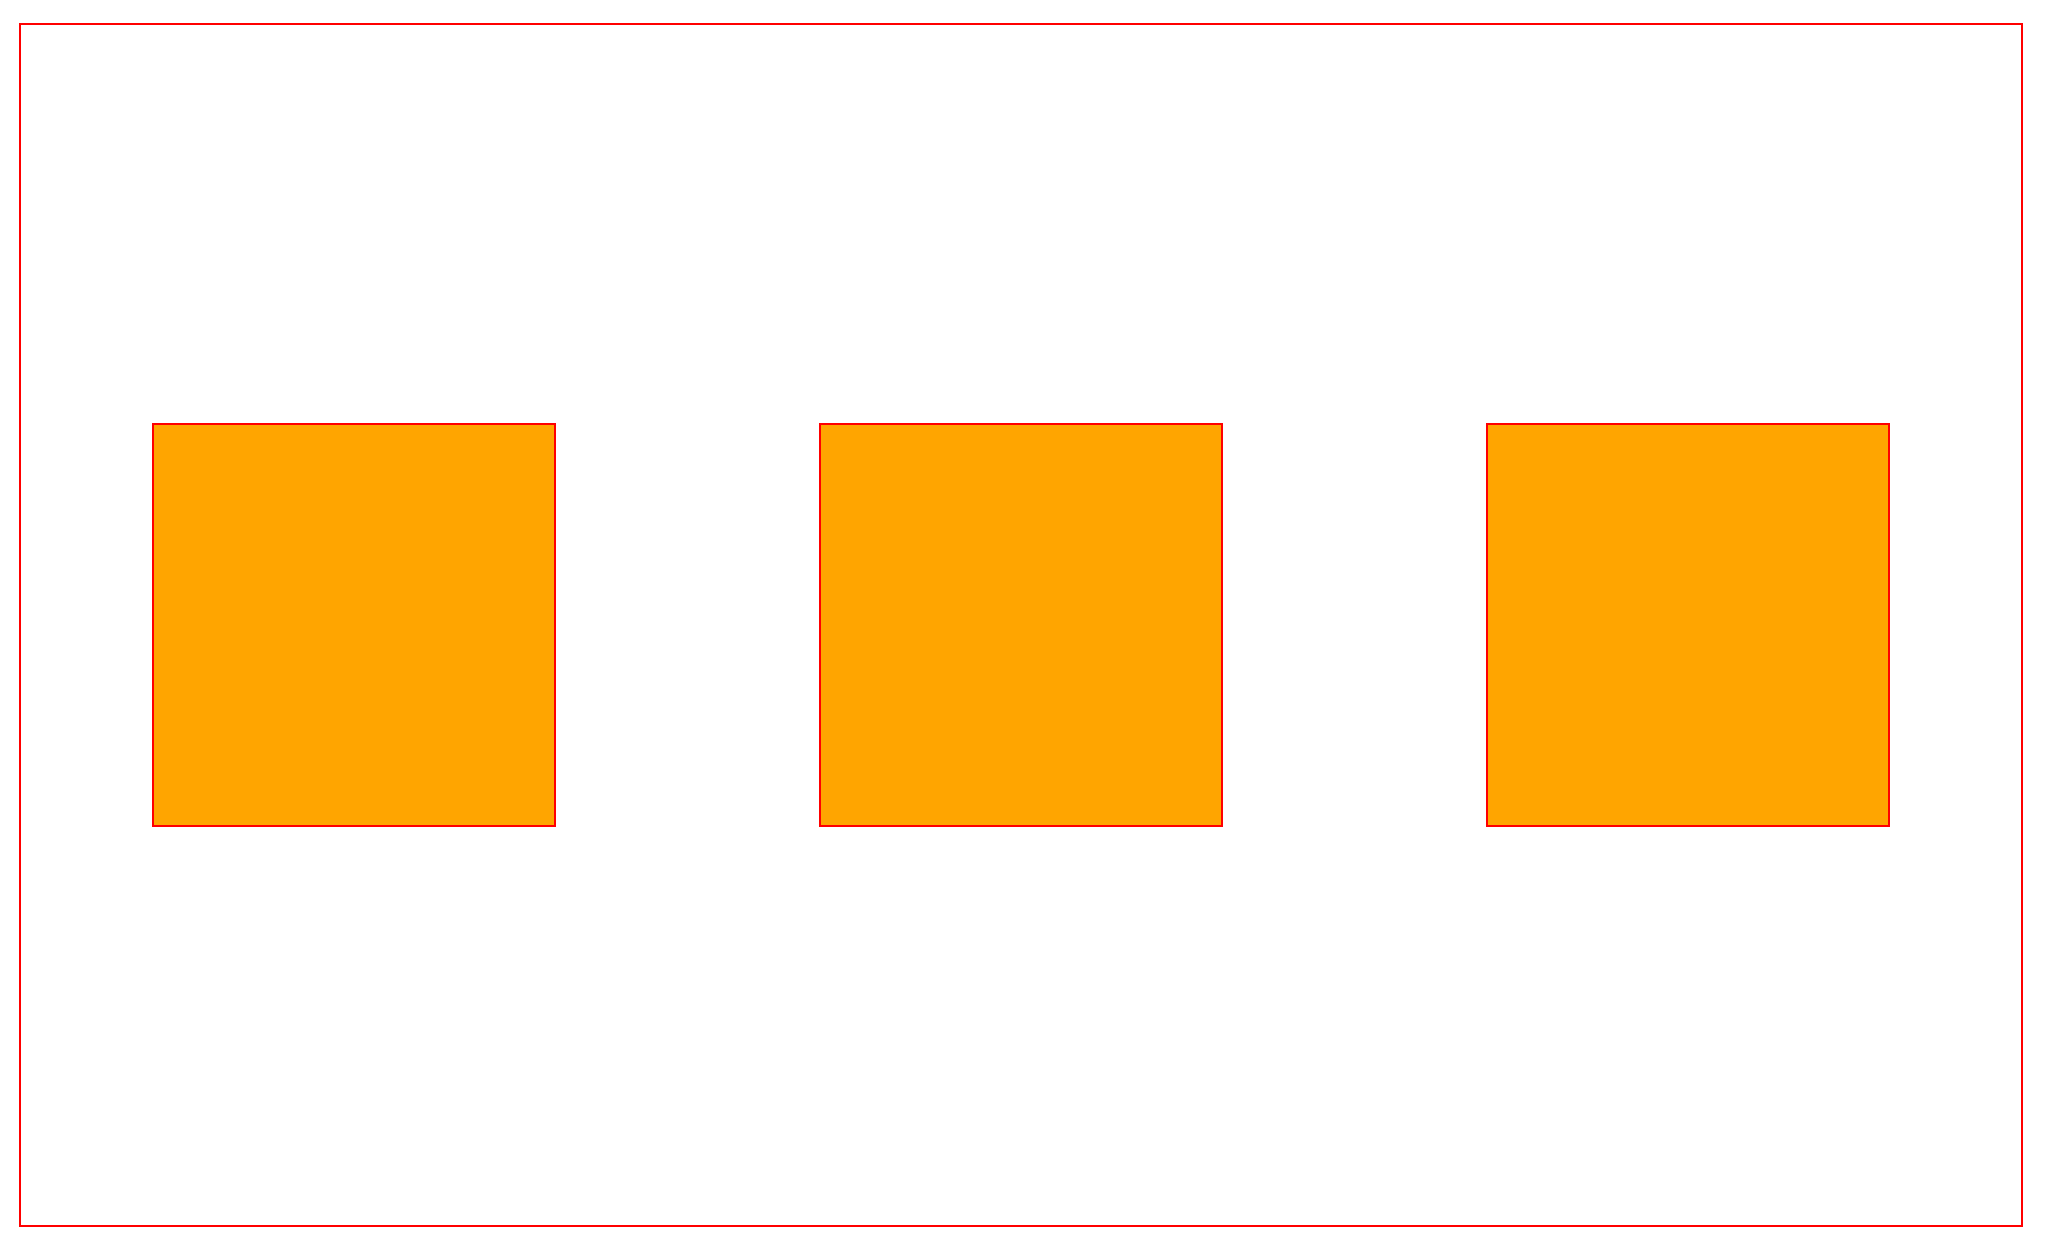
Another useful property is justify-content:
.flex {
    display: flex;
    justify-content: space-around;
}
This looks likes:
And the above property combined with align-items:
.flex {
    display: flex;
    justify-content: space-around;
    align-items: center;
}
Will change the result to:
As you can see, flexboxes are extremely useful for creating different layouts!
https://css-tricks.com/snippets/css/a-guide-to-flexbox/ is an extremely comprehensive guide on the different properties of flexboxes, and we highly recommend you take a look as you will be using flexboxes in your first assignment.
If you wish to practice using flexboxes, Flexbox Froggy is a great and fun way to do so! Another similar and useful CSS layout system is CSS Grid. We will not be doing a tutorial on CSS Grid, but we highly recommend checking out CSS Grid Garden to learn it!
CSS Validation
As before with HTML, you can (and should!) also validate your CSS at services like https://jigsaw.w3.org/css-validator/. Make sure to also do this validation before submitting any of your CSS files in upcoming assignments! Try it out now with the example you've been working on.
Bootstrap
It can be a lot of work writing all this HTML and CSS! This is where Bootstrap comes in handy. Bootstrap is a free collection of tools for creating websites and web applications. It contains HTML and CSS-based design templates for typography, forms, buttons, navigation and many other interface components.
Bootstrap’s most valuable attribute is that it makes website responsivity easy. Bootstrap first optimizes their code on mobile devices and then uses media queries to scale upwards. Thus, they do all the work for you.
Example 1 from the HTML section would be written like this with the addition of Bootstrap:
<!DOCTYPE html>
<html lang="en">
    <head>
        <meta charset="utf-8" />
        <meta name="viewport" content="width=device-width, initial-scale=1, shrink-to-fit=no">
        <!-- Bootstrap CSS -->
        <link rel="stylesheet" href="https://stackpath.bootstrapcdn.com/bootstrap/4.4.1/css/bootstrap.min.css" integrity="sha384-Vkoo8x4CGsO3+Hhxv8T/Q5PaXtkKtu6ug5TOeNV6gBiFeWPGFN9MuhOf23Q9Ifjh" crossorigin="anonymous">
        <!-- your CSS can be added here -->
        <title>Page title. Shown in tabs.</title>
    </head>
    <body>
        <h1>Simple Page!</h1>
        <p>This is a totally bare-bones page.</p>
        <!-- this is a comment and is totally ignored -->
        <!-- the following scripts must be added for Bootstrap to function properly.
            their order is important, don’t mix them up! -->
        <script src="https://code.jquery.com/jquery-3.4.1.slim.min.js" integrity="sha384-J6qa4849blE2+poT4WnyKhv5vZF5SrPo0iEjwBvKU7imGFAV0wwj1yYfoRSJoZ+n" crossorigin="anonymous"></script>
        <script src="https://cdn.jsdelivr.net/npm/popper.js@1.16.0/dist/umd/popper.min.js" integrity="sha384-Q6E9RHvbIyZFJoft+2mJbHaEWldlvI9IOYy5n3zV9zzTtmI3UksdQRVvoxMfooAo" crossorigin="anonymous"></script>
        <script src="https://stackpath.bootstrapcdn.com/bootstrap/4.4.1/js/bootstrap.min.js" integrity="sha384-wfSDF2E50Y2D1uUdj0O3uMBJnjuUD4Ih7YwaYd1iqfktj0Uod8GCExl3Og8ifwB6" crossorigin="anonymous"></script>
    </body>
</html>
This code would look like so when rendered:
When you compare this result to Example 1’s result, Bootstrap’s CSS styling is already evident.
You are now set up and able to use any Bootstrap component you’d like! If you’d like more information concerning this starter template, check out https://getbootstrap.com/docs/4.4/getting-started/introduction/.
Let’s try out a few of Bootstrap’s components that will be useful in your future assignments.
Navbar
You’ll often need navigation bars when designing a website. Luckily, Bootstrap has an easily customizable navbar that will be introduced here.
<nav class="navbar fixed-top navbar-expand-lg navbar-light bg-light">
    <button class="navbar-toggler" type="button" data-toggle="collapse" data-target="#navbarContents" aria-expanded="false" aria-label="Toggle navigation">
    <span class="navbar-toggler-icon"></span>
    </button>
    <div class="collapse navbar-collapse" id="navbarContents">
        <div class="navbar-nav">
            <a class="nav-item nav-link active" href="#">Home <span class="sr-only">(current)</span></a>
            <a class="nav-item nav-link" href="#">Features</a>
            <a class="nav-item nav-link" href="#">Pricing</a>
        </div>
    </div>
</nav>
Again, let’s walk through the code:
-
You create a navbar by using the
<nav>tag with the "navbar" class. "navbar-expand-lg" is a class that controls the responsivity of the navbar and says that the navbar should be expanded at large screen sizes but collaped into a hamburger menu on non-large screen sizes. "fixed-top" is optional and will make the navbar stick to the top of the screen. "navbar-light" and "bg-light" are both there for the color scheme. More information on how you can play around with colors is available here. -
Everything inside the
<button>tag will create a hamburger menu for the navbar once the screen is too thin. Note the "data-target" attribute, which is the ID of the div containing some of the header contents. So the hamburger menu will contain all of the items within this div. The two aria attributes are there to help accessibility tools, like screen readers, operate. -
In the first
<a>, the "active" class will darken the "Home" text to show users what page they are currently on. The<span>element is there for screen readers, and with the "sr-only" class, standing for screen reading only, it will only reveal itself for people using that device. -
Notice how all the "href" attributes in the
<a>tags point to "#". This scrolls the user to the top of the screen. When you implement your own navbars, you should replace these with your own links.
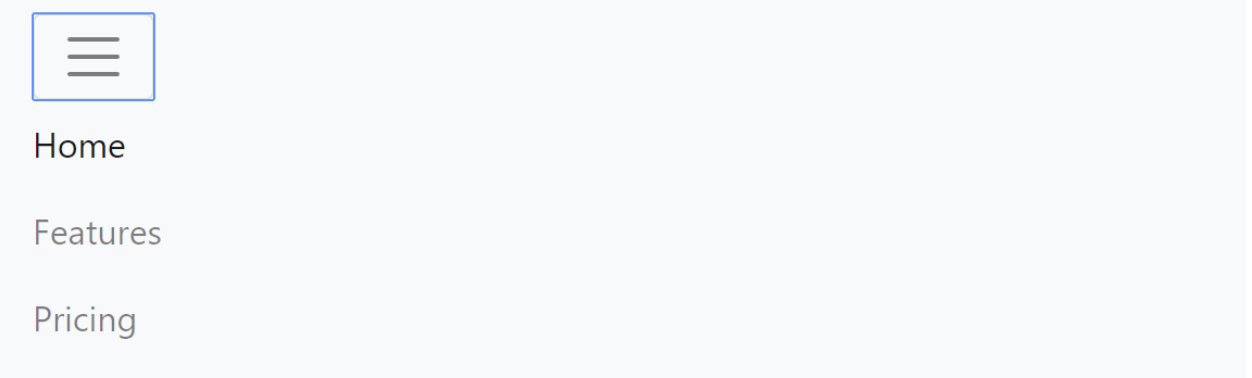
This code renders like so:

This is what it looks like when the window is small enough:

And with the hamburger menu expanded:
If you’d like to see more information on navbars, Bootstrap has extensive documentation.
Table
Bootstrap also provides classes that can help stylize your tables.
Let’s see what the table we made in the HTML section looks like with
the addition of Bootstrap. All we do is add
class="table" to the table tag.
| AND | F | T |
|---|---|---|
| F | F | F |
| T | F | T |
That looks much better! Again, Bootstrap is responsive, so the table will stretch to fill the screen. This, like everything else, can be changed if you’d like your table to have a certain maximum width.
There are many, many more customization options, including background coloring and table borders, that Bootstrap details on their own site.
Forms
We can also spruce up our forms.
<form action="myURL" method="POST">
    <div class="form-group">
        <label for="noodle">What is your favorite type of noodle?</label>
        <input id="noodle" type="text" class="form-control" required/>
    </div>
    <div class="form-group">
        <p>Would you eat noodles every day?</p>
        <div class="form-check">
            <input name="daily" type="radio" value="yes" id="yes" class="form-check-input"/>
            <label for="yes" class="form-check-label">Yes, gladly!!</label>
        </div>
        <div class="form-check">
            <input name="daily" type="radio" value="no" id="no" class="form-check-input"/>
            <label for="no" class="form-check-label">No, that’s impossible</label>
        </div>
    </div>
    <input type="submit" class="btn btn-primary" value="Submit Response" />
</form>
As you can see, this is the form example from the HTML section, but
with a few changes. Now, each question is surrounded by a
<div> with the form-group class.
This makes it easier to give your forms structure.
Text inputs are given the class form-control.
Additionally, the radio button + label pair are surrounded by their
own specific <div> with the
form-check class. The button itself is given the
form-check-input class while the label gets
form-check-label, so it can receive the formatting it
needs to stay next to its corresponding radio button. These classes
also work for checkboxes.
Lastly, the submission button gets one class for its button styling,
btn, and one class for its coloring,
btn-primary.
Here is our new and improved form:
As always, Bootstrap has its own extensive documentation.
Getting the Stencil
For this pre-lab, you can access the stencil code here. After reading through the sections above, you should be familiar with HTML and CSS. There are two tasks defined in the stencil code.
- Task 1: Inside of
index.html, you will find your first task. You should add form attributes to the form that will pass the "search_term" value to results.html. You can verify that this working properly by ensuring that you see your search term at the top of theresults.htmlpage. - Task 2: Inside of
results.html, you will find your second task. This task requires re-styling this page. We have provided you with bootstrap and astyle.cssfile. You will not be graded on your design capabilities, but we would like you to experiment with the CSS that you've learned in this pre-lab.
Handing in
To hand in your code for pre-lab 2, simply commit and push your changes to your cloned GitHub Classroom repository's main branch before the deadline. For more information on Git, review Assignment 0's Git section, ask on Piazza, or come to TA Hours.
Last Notes
This is the end of the pre-lab! It is a lot to digest, so if you have any confusion, feel free to come to TA Hours or post a question on Piazza.