« Back to the main CS 300 website
Project 1: Strings + Vectors
Strings part (excl. mbslen) due Feb 5, 2021 at 6:00pm AoE
Everything else due Feb 12, 2021 at 6:00pm AoE
Introduction
In the first portion of this project, you will implement a subset of C’s string manipulation library. In the second portion of this project, you will create your own implementation of a vector datastructure (a structure similar to std::vector in the C++ Standard Library or to an ArrayList in Java). Through both portions of the project, you will gain a better understanding of pointers as well as the general layout of data in memory.
You’re unlikely to ever find yourself implementing your own string or vector library outside this course. However, this assignment is designed to teach you about data representation concepts in memory that software engineers in industry use every day. Plus, it doesn’t hurt to understand how the standard libraries does their magic!
Learning Objectives
- Learn how to work with pointers.
- Understand how data is laid out in memory.
- Become familiar with popular string library functions.
- Become familiar with memory allocation and deallocation functions (
malloc, realloc, free).
- Appreciate the more advanced data structures available in the C++ standard library.
Conceptual Questions
- Write your answers to the following questions in your README.
- You should be able to answer the General Questions without any additional project context. You should be able to answer the project-specific questions after you’ve read through the handout.
General Questions:
- What is the expected output of the following program and why?
#include <stdio.h>

void func(const char* s) {
    s++;
}

int main() {
    char* hello = "hello";
    func(hello);
    printf("%s", hello);
}
- The diagram below shows 2 arrays and respective pointers to each one.
ptr1 is of type char * and ptr2 is of type int *. If ptr1 points at address 0x1, what would be the address pointed to by ptr1 + 1? If ptr2 points at address 0x1, what address would ptr2 + 1 point to?


Project-specific questions:
- What is the difference betweeen a vector and an array? When would you choose to use one over the other?
- Consider the following program. Which segments of memory are
main, vector_type, int_vector, and fun_adjective located in? The segments of memory you should be considering are the code segment, data segment, stack, and heap.
- Check out the optional section of Lab 1 for some hints!
#include <string.h>
#include "vector300.h"

size_t vector_type = 4;

int main() {
    int val = 5;
    char fun_adjective[8];
    vector_t int_vector;
    strncpy(fun_adjective, "awesome", 8);
    initialize_vector(&int_vector, vector_type);
    vector_add_back(&int_vector, &val);
    destroy_vector(&int_vector);
}
Socially Responsible Computing Questions:
The main goal behind the Unicode character encodings is to create encoding standards applicable throughout the world and for all languages. Thus, Unicode has a wider range of characters compared to ASCII. Please read this opinion piece (by Aditya Mukerjee), which highlights some of the shortcomings of Unicode.
- What problems might the composition of the Unicode Consortium (the group that determines the list of Unicode characters) create, and why? Describe at least two.
- What could a better process for choosing the Unicode Consortium members look like? (Please do not just paraphrase the article’s suggestions; we’re interested in creative ideas here.)
Installation
If you have completed Lab 0, you will already have created a private GitHub repository for your project work under the csci0300 organization.
If you have not completed Lab 0, we suggest that you do it now!
Recall, to clone your repository for the projects, you run this command (inside the course VM, or on the computer you’re working on):
$ git clone git@github.com:csci0300-s21-projects-YOURUSERNAME.git
(You’ll hopefully have done this as part of Lab 0 already.)
Now, ensure that your repository has a handout remote. Type:
$ git remote show handout
If this reports an error, run:
$ git remote add handout https://github.com/csci0300/cs300-s21-projects.git
Then run:
$ git pull
$ git pull handout master
This will merge our Project 1 stencil code with your repository.
Once you have a local working copy of the repository that is up to date with our stencils, you are good to proceed. You’ll be doing all your work for this project inside the strvec directory in the working copy of your projects repository.
Infrastructure help
Part 1: Strings
String manipulation is an important concept in computer science, and it is something that comes up very often in systems programming. Most programming languages have a string library that relieves programmers from writing their own string operations for every program. The C Standard Library has some excellent string manipulation facilities, but we want to assemble one ourselves!
For this part of the project, you will implement a subset of C’s standard library string functions for ASCII text. You will also explore a different character representation, the UTF-8 encoding (a Unicode character set).
Stencil
| Relevant Files |
Description |
strings.c |
Contains the stencil for the string library you will be implementing. |
strings_tests.c |
Contains a few basic tests for each string (and wchar) function. You may want to add more to ensure your code is working correctly. |
mbstrings.h |
Contains the header for your mbslen implementation. |
mbstrings.c |
Contains the stencil for the mbslen function you will be implementing. |
test_runner.c |
This is the entry point for the program. It contains a few helper functions to write unit tests. It will run the corresponding unit tests according to the arguments you run the program with. |
Makefile |
This will compile the .c files into two different test executables. Check out theCompile and Run section below for more information. |
Your String Library
Task: Implement the following string functions in strings.c.
- To get used to working with pointers, exclusively use pointer operations rather than array notation (brackets []). There should be no brackets in your code.
- All functions that you’ll need to use are defined in
strings.c. There are no external library functions allowed.
- There are a few tests in
strings_tests.c. While these test basic functionality, these are not extensive – so don’t rely on these alone to test your code.
- Please comment your code and explain any complicated logic.
Note: Here are the details about the functions you are implementing (click to expand on each function). We’ve also included a link to the relevant man page for each function — Linux man pages provide great documentation on C library functions and are a helpful resource for understanding the behavior of edge cases.
strlen: Computes the length of a string, excluding the terminating null byte.
Check out the manual page: Man Page
Synopsis:
size_t strlen(const char* s);
Examples:
size_t len = strlen("ALGOT / SKADIS"); // len = 14
strncmp: Compares the first (at most) n bytes of two strings.
Check out the manual page: Man Page
Synopsis
Returns a number less than, equal to, or greater than 0, if the bytes in s1 are found to be lexicographically less than, equal to, or greater than those in s2.
int strncmp(const char* s1, const char* s2, size t n);
Examples:
int result = strncmp("ABCXYZ", "ABCXYZAAO", 6);
result = strncmp("abcde", "abdde", 3);
result = strncmp("abcde", "abdde", 2);
result = strncmp("1234567", "123", 100);
strncpy: copies the first n bytes from one string to another.
Check out the manual page: Man Page
Synopsis:
Copies at most n bytes of the string pointed to by src to the buffer pointed to by dest. If the length of src is less than n, strncpy() writes additional null bytes to dest to ensure that a total of n bytes are written.
char *strncpy(char* dest, const char* src, size_t n);
Examples:
char dest[] = "MACKAPAR";
strncpy(dest, "TJUSIG", 3);
Note
Think about why we might have used a char[] instead of a char* for dest.
strchr: Finds the first occurrence of one character within a string.
Check out the manual page: Man Page
Synopsis:
Finds the first occurrence of the character chr (represented as an int) in the string str and returns a pointer to that occurrence.
char* strchr(const char* str, int chr);
Examples:
char c = 'N';
char* str = "---HOLJES---NYMANE---NYMANE---";
char* location = strchr(str, (int)c);
strtok: Parses a string into a series of tokens.
Check out the manual page: Man Page
Synopsis:
The strtok() function parses a string, str into a sequence of tokens around the delimiters defined in delim. On the first call to strtok() the string to be parsed should be
specified in str. In each subsequent call that should parse the same string, str should be NULL. Note that strtok() does not require that the characters pointed to by str remain unmodified .
char* strtok(char* str, const char* delim);
Examples:
char* delim = " ";
char str[20] = "hello everyone!";
char* first = strtok(str, delim);
char* second = strtok(NULL, delim);
char str2[20] = "hello all!"
char* delim_2 = "yl";
first = strtok(str2, delim_2);
second = strtok(NULL, delim_2);
char* third = strtok(NULL, delim_2);
Supporting Extended Character Sets
You may recall from lecture, that ASCII, which can be represented in 1 bytes characters, is the American Standard Code for Information Interchange. However, ASCII is only meant for English and it does not support accents or characters from non-Latin alphabets. Programmers often need to support extended character sets (most commonly UTF-8) to support extended character sets for more inclusive applications.
When programming for extended character sets, some of the standard library support functions for single character (ASCII) strings will not work as intended. C provides support for multibyte characters through their wchar_t struct, which represents a character in 4 bytes. However, since many extended character sets have variable length characters (for example, UTF-8 encodes characters in 1-4 bytes), using wchar_t leads to wasted space in memory. Moreover, programs often receive UTF-8 text as input that isn’t nicely laid out in 4-byte chunks, and must still be able to process it. (As an example, consider a website that processes input from a form: users may put strings like “γνωρίζω” or “❤️😺” into the form!)
In this part of the assignment, you will practice implementing string functions that are compatible with the UTF-8 character set without relying on multi-byte character data types.
UTF-8 characters follow a set byte format based on their length. 1 byte UTF-8 characters are meant to be compatible with ASCII, which means that they always begin with a 0 bit. For 2-4 byte UTF-8 characters, the number of leading 1s indicates the lengh of the character (in bytes). Each subsequent byte begins with the bits 01. You can find an overview of the format below:
| Length (bytes) |
Encoding (binary) |
| 1 |
0xxxxxxx |
| 2 |
110xxxxx 10xxxxxx |
| 3 |
1110xxxx 10xxxxxx 10xxxxxx |
| 4 |
11110xxx 10xxxxxx 10xxxxxx 10xxxxxx |
Task: Implement mbslen() in mbstrings.c to count the number of UTF-8 characters in an input string.
- There are a few tests in
strings_tests.c. While these test basic functionality, these are not exhaustive – so don’t rely on these alone to test your code.
- Please comment your code and explain any complicated logic.
mbslen: Counts the number of UTF-8 code points ("characters") in a UTF-8 encoded string.
Synopsis:
mbslen counts the number of code points in the UTF-8 multi-byte string stored in bytes until a null character is hit. Note that in this part of the assignment the number of “characters” does not correspond to the number of bytes, but to the number of valid UTF-8 code points; see the UTF-8 encoding table for more details.
size_t mbslen(const char *bytes);
Examples:
char *emojis = "🥳😊😄";
size_t len = mbslen(emojis);
// len = 3
Compile, Run, and Test
The Makefile
- Run
make inside the stencil directory to compile your work into a test executable. (This will create two executables, run_tests and run_builtin_tests)
- Look at lab 1 for more details on how makefiles work.
- Note: You may see compiler errors from
strings.c. Don’t panic. Just look at each error one by one, and look them up online if you get confused.
Test your work (run_tests)
./run_tests will run the unit tests in strings_tests.c on the string library you implemented.- Run
./run_tests all to test against the entire test suite.
- All of the tests can also be run using the
make check command provided in the Makefile
- Run
./run_tests <test name(s)> to test against a specific test or list of tests.
Test against the C Standard Library (run_builtin_tests)
./run_builtin_tests will run the unit tests in strings_tests.c on the builtin C Standard Library.- This is useful for understanding the expected behavior of the string functions and writing your own tests. (If the tests in
strings_tests.c are valid tests, these should always pass)
- Run
./run_builtin_tests <all | test names(s)> to test against all tests, a specific test, or list of tests
Write your own tests in strings_tests.c
test_runner.h describes some helper functions that are useful for writing unit tests.- Write your tests in
strings_test.c, and look at the provided tests for inspiration.
Need help running your code?
make
./run_tests strlen strstr
./run_tests all
./run_builtin_tests all
Tips for Getting Started
- Try implementing one function at a time and testing it before you move on.
- Before implementing a function, make sure you understand how it works.
- Read the function comments and details above for examples.
- Look at the man pages for a more detailed description of the function and its edge cases.
- Look at the unit tests in
strings_tests.
- Try writing your own unit tests, and testing them against the builtin standard library
- Remember that in C, even though we’re requiring you to use pointer operations, you can think of the type
char * as any of three things: a pointer to a single character, a string, or an array of characters. These are all the same!
Tips for Debugging
- See if your code works on simpler test cases, and then work your way up to the more complicated ones.
- Use the GDB (GNU Debugger) to understand where your code is breaking.
- Take a look at Lab 1 to refresh your memory on how to debug using GDB.
- Use this GDB Cheatsheet.
break, continue, next, print, x (examine), and backtrace are particularly helpful commands for this assignment.
$ make
$ gdb run_tests
(gdb) b test_strlen
(gdb) b strlen
(gdb) r strlen
Part 2: Vectors
One common data structure which you may be familiar with is an array. Internally, arrays are just adjacent elements of the same type in memory. This allows for fast traversal of the data since iterating though the array elements is as simple as the CPU incrementing a pointer. However, standard arrays are a fixed length and cannot be grown after they have been declared. One alternative to an array is a linked list, which has no fixed size. However, linked lists are what are known as “pointer chasing” data structures. Each element in a linked list includes a pointer to the next, but none of the elements are necessarily near each other in memory.
In this part of the project you will implement a vector, sometimes refered to as an “arraylist”, which is a compromise between the two data structures. Vectors, like arrays, hold their contents in a contiguous region of memory. However, like linked lists, they can dynamically grow in size by reallocating space for their data. To avoid reallocating data everytime a new element is added, they’ll often allocate more space than the user requested.
Assignment Specification
In this part of the project, you will create your own implementation of a vector in C. Following this project, you will use vectors, as well as many other data structures defined in the C++ standard template library, for future assignments.
You have been provided with the basic structure for a vector in vector300.h. The defintion of this struct is below:
typedef struct vector300
{
void *array;
size_t ele_size;
size_t capacity;
size_t length;
} vector_t;
Notes and Resources:
- What is the
size_t data type in C?
size_t ele_size: This field allows your vector implementation to be generic!
- Example:
- For a vector of ints, the
ele_size field will be 4.
- For a vector of chars, the
ele_size will be 1.
size_t capacity: To avoid reallocating data every time a new element is added, your vectors will often allocate more space than the user requested. We use the capacity field to distinguish between the number of elements the vector dynamically allocated space for and the the number of elements the user requested (the length field).
- To balance allocating a huge chunk of unused memory and having to repeatedly reallocate data, vectors will often define an initial capacity, and each time the user meets this capacity, it will double the capacity. This is how the C++
vector implmentation and Java’s ArrayList implementation work.
Capacity Doubling Example
- Let’s say the user requests an empty vector of ints. The
length would be 0, but the vector might allocate 40 bytes of memory for an initialcapacity of 10 ints.
- If the user adds an element to the vector, the
length would be 1 but the underlying capacity would remain 10.
- Once the user adds a total of 10 ints to the vector, the vector will double the capacity to 20 elements and reallocate 80 bytes of memory. (
length: 10, capacity: 20)
Task:
Complete the vector implementation by filling in the following functions within vector.c. Click on each function for more details of their implementation. This portion of the project, like the last, should be implemented in C.
All of the functions you are responsible for implementing is contained within vector.c.
initialize_vector: Initializes all the fields of a vector
void initialize_vector(vector_t* v, size_t type)
- This function is responsible for allocating space for and initializing all of the fields of the vector pointed to by the first argument,
v.
- The second argument,
type, indicates the size of the elements in v.
- For the purposes of this project, you should initialize your vector to have a starting capacity of 1.
destroy_vector: Frees a vector
void destroy_vector(vector_t* v)
This function is responsible for freeing any space within the vector v that was allocated. It is expected that every call to malloc has a corresponding call to free. As such, you should use the destroy_vector function to free any data within your vector that was allocated using a malloc function.
vector_size: Returns vector length
size_t vector_size(vector_t* v);
- This function simply returns the length of the vector
v (in units of elements).
- The behavior for this function should be equivalent to the
size function of C++ vectors.
vector_get: Returns an element in the vector at a particular index
void* vector_get(vector_t* v, int index)
- This function gets the element at a specified index in the vector
v. A void pointer is returned to allow the vectors to be of generic type (it is expected that the caller casts the result to their desired type). The vectors are indexed into using zero indexing (meaning the first element is at index 0 and the last element is at index length-1)
- The behavior
vector_get should be equivalent to the at function of C++ vectors; failure cases should return a null pointer.
vector_add_back: Adds an element to the end of a vector
void vector_add_back(vector_t* v, void* ele)
- This function adds a copy of the desired element to the end of the vector
v. If your vector has reached capacity, this function is also responsible for growing the vector’s array. Each time a vector reaches capacity, its capacity should be doubled.
- The behavior of
vector_add_back should be equivalent to the c++ vector push_back function
- Note: your
vector_add_back implementation will have to use memory allocation functions (such as realloc), which should be traditionally error checked. However, since your vector is meant to be modeled after the C++ vector implementation, which has no return value for push_back and will instead silently fail, it is acceptable for your vector implementation to omit error checking on allocation functions.
vector_delete_back: Removes the last element from the vector
void vector_delete_back(vector_t* v)
- This function removes the last element (the element at index length-1), from the vector
v.
- HINT: This function is actually quite simple. You don’t need to do anything from a memory perspective.
- The behavior of this function should be equivalent to the
pop_back function of C++ vectors.
vector_add: Adds an element to the vector at a specific index
void vector_add(vector_t *v, void *ele, int index)
- This function adds a copy of the desired element to the specified index within the vector. As vectors are just dynamically sized arrays and elements in arrays are contiguous, the valid indices for
vector_add are 0 through the vector’s current length. If the index specified is not the vector’s current length (meaning you aren’t just tacking on another element to the end of the array), the new element should not overwrite the element currently at that index. Instead, the contents of the array starting at the desired index to the array’s end should be moved so that the new element can be inserted. Once again, this function is repsonsible for increasing the capacity of the vector once the current capacity is reached.
- The functionality of
vector_add should be equivalent to the insert function of C++ vectors. Just note that insert takes in an itertaor as an argument to indicate the desired position within the vector while your implementation will simply use an integer to represent the desired index.
- Once again, you do not need to error check allocation functions for
vector_add. You may allow your implementation to silently fail like the c++ vector.
vector_delete: Removes an element from the vector at a specific index
void vector_delete(vector_t *v, int index)
- This function removes the element at the specified index. In order to keep the vector’s internal array contiguous, the contents of the array starting at the next index through the end of the array should be shifted so that there are no gaps. Valid indices for the
vector_delete function are 0 through the vector’s current length - 1.
- The functionality of vector_delete should match the
erase function of c++ vectors. Just note that, like insert, erase uses an iterator rather than in integer to indicate the desired index.
A Note on Pointer Arithmetic:
Recall from lecture that when you perform operations on pointers, the pointer is incremented/decremented in units of sizeof(type) bytes.
In this project, the pointers you are working with are void (meaning they have no specified type) so that your vector implementation can be generic. However, performing pointer arithmetic on void pointers will result in compiler errors since the compiler will not know by how many bytes the pointer should actually be indexed. One way to solve this is to first cast your pointer to a char* before doing any operations on it. Once you have casted your pointer to a char*, you can then access the elements at various offsets from the pointer by adding the exact number of bytes between the pointer and the desired element.
Relevant Library Functions
malloc: Allocates a block of memory
Check out the manual page: Man Page
void *malloc(size_t size)
This function allocates a region of memory of the desired size in the heap and returns a pointer to it.
realloc: Changes the size of a memory block
Check out the manual page: Man Page
void *realloc(void *ptr, size_t size)
- This function changes the size of the region of memory pointed to by
ptr to size.
- Realloc on a null pointer is equivalent to calling malloc
- The
ptr must be a pointer that was previously returned by another system call in the malloc family (unless it is null)
free: Frees a block of memory
Check out the manual page: Man Page
void free(void *ptr)
- This function frees the memory pointed to by
ptr so that it can be later reused by the system
- The
ptr must be a pointer that was previously returned by a function in malloc family
memcpy: Moves bytes from one region of memory to another non-overlapping region
Check out the manual page: Man Page
void *memcpy(void *dest, void *src, size_t n)
- This function moves
n bytes from the region of memory pointed to by src to the region pointed to by dest
- For
memcpy, the regions of memory indicated by src and dest cannot overlap
memmove: Moves bytes from one region of memory to another
Check out the manual page: Man Page
void *memmove(void *dest, void *src, size_t n)
- Like
memcpy, this function moves n bytes from src to dest. However, for memmove, src and dest are allowed to be overlapping regions of memory.
Compile, Run, Test
The Makefile
- run the
make command. This will create the testsuite executable to be used to run tests.
- To run, you can either use
./testsuite or make check
Testing
This test suite compares your vector implementation to the C++ standard library vector (std::vector). When your implementation is fully functional, the testsuite executable should print nothing out besides your point total.
Upon test failure, the testsuite prints out the expected state of the vector versus your vector. This output, in addition to the use of gdb, should help you track down and fix your errors. Additionally, the Makefile compiles the vector code with an address sanitizer. As such, you will get warnings if your implementation has any memory leaks or errors. A fully functional implementation should show no error output from the address sanitizer while it’s running.
Often you or your programs may need to know the character set used in a file in order to interpret it. Linux actually provides a utility to do this that you may be familiar with, the file program:
$ cat some_text_file.txt
asdf
$ file some_text_file.txt
some_text_file.txt: ASCII text
$ cat some_utf8_file.txt
asdf❤️
$ file some_utf8_file.txt
UTF-8 Unicode text
As an extra credit assignment, you will have the opportunity to implement your own file encoding detector!
All of the code for the extra credit can be found in the directory extra-credit. This directory contains the following files:
| Relevant Files |
Description |
file.c |
Here, you will have the opportunity to implement the detect_encoding() function which will return the character set used in a given file. |
encoding_tests |
A directory containing text files of various encodings that can be used to test the extra credit assignment. |
Makefile |
This will compile the file.c into the file executable. Check out theCompile and Run section below for more information. |
Assignment Specification
For this part of the project you will be implementing your own file utility (in file.c). Given a file as input, your file implementation should print out whether the given file is encoded using ASCII, UTF-8, or neither (undefined). Feel free to research other character sets to detect in your implementation; however, only ASCII and UTF-8 are required.
Task: Implement the the function detect_encoding() in file.c.
detect_enocding() should return ASCII, UTF-8, or UNDEFINED based on the encoding of the provided file
ASCII should only be returned if ALL of the bytes in the input file are valid ASCII charactersUTF-8 should only be returned if ALL of the characters in the input file are valid UTF-8UNDEFINED should be returned if neither of the above are true
Relevant Library Functions
For this part of the assignment, you will have to be able to read input from files. You may find the below functions useful in doing so.
open: Opens a file
Check out the manual page: Man Page
int open(const char *filename, int flags)
This function opens a file designated by filename, with the mode indicated by flags. For the assignment, you only need to read from pre-existing files, which can be satisfied with the flag valueO_RDONLY. open returns a file descriptor (an integer), which may be used to reference the opened file in other functions.
close: Closes a file
Check out the manual page: Man Page
int close(int fd)
This function closes the file refered to by the file descriptor fd. The return value indicates if the function call succeeded (0) or failed (-1).
read: Reads bytes from a file
Check out the manual page: Man Page
char *read(int fd, void *buf, size_t n)
This function reads at most n bytes from the file refered to by fd and stores them in buf. The return value indicated the number of bytes read (which will be no more than n). read returns 0 if the end of the file is reached, and -1 if an error was encountered.
Compile, Run, Test
The Makefile
- Run the
make command. This will create the file executable
- To run your program against our provided test files, run
make check
Testing
The command make check runs your file utility against all our test files. Feel free to create more files to test your encoding detector as needed.
Stretch Goal (hard!)
If you feel adventurous, try to make your file utility produce the same output as the Linux utility, which prints additional information about files (e.g., whether they contain C source code, or what kind of executable they are).
You can go very deep down the rabbit hole here (e.g., to quite literally look into magic 🪄), but a reasonable attempt would match the output for simple text files and source code.
make check-stretch will compare your file tool to the Linux one.
Handing In Your Code
You will hand in your code using Git. In the strvec/ subdirectory, you MUST fill in the text file called README.md. The README.md file will include the following:
- Any design decisions you made and comments for graders, under “Design Overview”. If there’s nothing interesting to say, just list “None”.
- Any collaborators and citations for help that you received, under “Collaborators”. CS 300 encourages collaboration, but we expect you to acknowledge help you received, as is standard academic practice.
- Your answers to the conceptual questions at the start of this handout under “Conceptual Questions”.
- Notes on approximately how long it took you to complete the project. We won’t use this for grading, but we collect the data to calibrate for future years.
Grading breakdown:
- 45% (45 points) tested
string and wchar_t functionality (the test programs we hand out, plus others). If running ./run_tests reports that 100% of tests pass, you’ve probably got all these points.
- 30% (30 points) tested
vector functionality. If running make check reports Total score: 20 out of 20, you’ve probably got all these points.
- 20% (20 points) answers to conceptual questions.
- 5% (5 points) completed
README.md.
- The Extra Credit will be worth up to 6 additional points
Your submission will not be graded until you configure grading server. You should have used the grading server for Lab 0 already.
If you were registered for CS 300 on the first day of classes, you should have received credentials by email.
If you only recently registered or you’re shopping the course but haven’t registered, you won’t have an account yet. In that case, please complete this form and wait until you receive your credentials. We will create accounts based on the form entries at 8pm every day.
Step 1: Log into the grading server with the password you received. Once you’re logged in, enter your GitHub username (at the top).
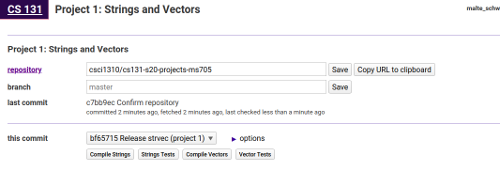
Step 2: Add the repository URL under the “Strings and Vectors” category. Click “Strings and Vectors” to initiate a fetch of your repository from GitHub.
Note: If your GitHub account is not linked to your Brown email address, the grading server will give you a command to run to verify your project repository.
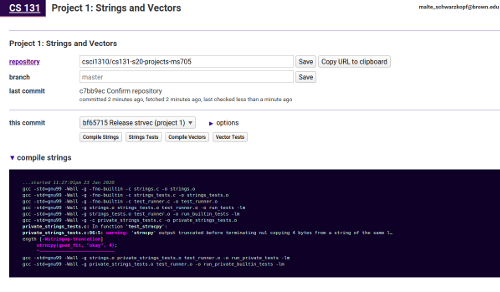
Step 3: You should see your commit listed on the Labs page, as shown above. You can use the buttons below the commit list to test your code in our grading environment. Make sure it still passes all the tests!
Congratulations, you’ve completed the first project!
Acknowledgements: We are grateful to Brown’s CS 33 course for providing the basis for the strings portiton of this project. The vectors and mbslen portions were developed for CS 300.
« Back to the main CS 300 website
Project 1: Strings + Vectors
Strings part (excl.
mbslen) due Feb 5, 2021 at 6:00pm AoEEverything else due Feb 12, 2021 at 6:00pm AoE
Introduction
In the first portion of this project, you will implement a subset of C’s string manipulation library. In the second portion of this project, you will create your own implementation of a vector datastructure (a structure similar to
std::vectorin the C++ Standard Library or to anArrayListin Java). Through both portions of the project, you will gain a better understanding of pointers as well as the general layout of data in memory.You’re unlikely to ever find yourself implementing your own string or vector library outside this course. However, this assignment is designed to teach you about data representation concepts in memory that software engineers in industry use every day. Plus, it doesn’t hurt to understand how the standard libraries does their magic!
Learning Objectives
malloc,realloc,free).Conceptual Questions
General Questions:
ptr1is of typechar *andptr2is of typeint *. Ifptr1points at address0x1, what would be the address pointed to byptr1 + 1? Ifptr2points at address0x1, what address wouldptr2 + 1point to?Project-specific questions:
main,vector_type,int_vector, andfun_adjectivelocated in? The segments of memory you should be considering are the code segment, data segment, stack, and heap.Socially Responsible Computing Questions:
The main goal behind the Unicode character encodings is to create encoding standards applicable throughout the world and for all languages. Thus, Unicode has a wider range of characters compared to ASCII. Please read this opinion piece (by Aditya Mukerjee), which highlights some of the shortcomings of Unicode.
Installation
If you have completed Lab 0, you will already have created a private GitHub repository for your project work under the
csci0300organization.If you have not completed Lab 0, we suggest that you do it now!
Recall, to clone your repository for the projects, you run this command (inside the course VM, or on the computer you’re working on):
(You’ll hopefully have done this as part of Lab 0 already.)
Now, ensure that your repository has a
handoutremote. Type:If this reports an error, run:
Then run:
This will merge our Project 1 stencil code with your repository.
Once you have a local working copy of the repository that is up to date with our stencils, you are good to proceed. You’ll be doing all your work for this project inside the
strvecdirectory in the working copy of your projects repository.Infrastructure help
Part 1: Strings
String manipulation is an important concept in computer science, and it is something that comes up very often in systems programming. Most programming languages have a string library that relieves programmers from writing their own string operations for every program. The C Standard Library has some excellent string manipulation facilities, but we want to assemble one ourselves!
For this part of the project, you will implement a subset of C’s standard library string functions for ASCII text. You will also explore a different character representation, the UTF-8 encoding (a Unicode character set).
Stencil
strings.cstrings_tests.cwchar) function. You may want to add more to ensure your code is working correctly.mbstrings.hmbslenimplementation.mbstrings.cmbslenfunction you will be implementing.test_runner.cMakefile.cfiles into two different test executables. Check out theCompile and Runsection below for more information.Your String Library
Task: Implement the following string functions in
strings.c.strings.c. There are no external library functions allowed.strings_tests.c. While these test basic functionality, these are not extensive – so don’t rely on these alone to test your code.Note: Here are the details about the functions you are implementing (click to expand on each function). We’ve also included a link to the relevant man page for each function — Linux man pages provide great documentation on C library functions and are a helpful resource for understanding the behavior of edge cases.
strlen: Computes the length of a string, excluding the terminating null byte.
Check out the manual page: Man Page
Synopsis:
Examples:
size_t len = strlen("ALGOT / SKADIS"); // len = 14strncmp: Compares the first (at most) n bytes of two strings.
Check out the manual page: Man Page
Synopsis
Returns a number less than, equal to, or greater than 0, if the bytes in s1 are found to be lexicographically less than, equal to, or greater than those in s2.
Examples:
strncpy: copies the first n bytes from one string to another.
Check out the manual page: Man Page
Synopsis:
Copies at most n bytes of the string pointed to by src to the buffer pointed to by dest. If the length of src is less than n, strncpy() writes additional null bytes to dest to ensure that a total of n bytes are written.
Examples:
Note
Think about why we might have used a
char[]instead of achar*fordest.strchr: Finds the first occurrence of one character within a string.
Check out the manual page: Man Page
Synopsis:
Finds the first occurrence of the character chr (represented as an int) in the string str and returns a pointer to that occurrence.
Examples:
strtok: Parses a string into a series of tokens.
Check out the manual page: Man Page
Synopsis:
The
strtok()function parses a string, str into a sequence of tokens around the delimiters defined in delim. On the first call to strtok() the string to be parsed should bespecified in str. In each subsequent call that should parse the same string, str should be NULL. Note that
strtok()does not require that the characters pointed to by str remain unmodified .Examples:
Supporting Extended Character Sets
You may recall from lecture, that ASCII, which can be represented in 1 bytes characters, is the American Standard Code for Information Interchange. However, ASCII is only meant for English and it does not support accents or characters from non-Latin alphabets. Programmers often need to support extended character sets (most commonly UTF-8) to support extended character sets for more inclusive applications.
When programming for extended character sets, some of the standard library support functions for single character (ASCII) strings will not work as intended. C provides support for multibyte characters through their
wchar_tstruct, which represents a character in 4 bytes. However, since many extended character sets have variable length characters (for example, UTF-8 encodes characters in 1-4 bytes), usingwchar_tleads to wasted space in memory. Moreover, programs often receive UTF-8 text as input that isn’t nicely laid out in 4-byte chunks, and must still be able to process it. (As an example, consider a website that processes input from a form: users may put strings like “γνωρίζω” or “❤️😺” into the form!)In this part of the assignment, you will practice implementing string functions that are compatible with the UTF-8 character set without relying on multi-byte character data types.
UTF-8 characters follow a set byte format based on their length. 1 byte UTF-8 characters are meant to be compatible with ASCII, which means that they always begin with a 0 bit. For 2-4 byte UTF-8 characters, the number of leading 1s indicates the lengh of the character (in bytes). Each subsequent byte begins with the bits 01. You can find an overview of the format below:
0xxxxxxx110xxxxx 10xxxxxx1110xxxx 10xxxxxx 10xxxxxx11110xxx 10xxxxxx 10xxxxxx 10xxxxxxTask: Implement
mbslen()inmbstrings.cto count the number of UTF-8 characters in an input string.strings_tests.c. While these test basic functionality, these are not exhaustive – so don’t rely on these alone to test your code.mbslen: Counts the number of UTF-8 code points ("characters") in a UTF-8 encoded string.
Synopsis:
mbslencounts the number of code points in the UTF-8 multi-byte string stored in bytes until a null character is hit. Note that in this part of the assignment the number of “characters” does not correspond to the number of bytes, but to the number of valid UTF-8 code points; see the UTF-8 encoding table for more details.Examples:
char *emojis = "🥳😊😄"; size_t len = mbslen(emojis); // len = 3Compile, Run, and Test
The Makefile
makeinside the stencil directory to compile your work into a test executable. (This will create two executables,run_testsandrun_builtin_tests)strings.c. Don’t panic. Just look at each error one by one, and look them up online if you get confused.Test your work (
run_tests)./run_testswill run the unit tests instrings_tests.con the string library you implemented../run_tests allto test against the entire test suite.make checkcommand provided in the Makefile./run_tests <test name(s)>to test against a specific test or list of tests.Test against the C Standard Library (
run_builtin_tests)./run_builtin_testswill run the unit tests instrings_tests.con the builtin C Standard Library.strings_tests.care valid tests, these should always pass)./run_builtin_tests <all | test names(s)>to test against all tests, a specific test, or list of testsWrite your own tests in
strings_tests.ctest_runner.hdescribes some helper functions that are useful for writing unit tests.strings_test.c, and look at the provided tests for inspiration.Need help running your code?
# Make the executables
make

# Runs tests from `test_strlen` and `test_strstr`in `strings_tests.c`
# on your strings library
./run_tests strlen strstr

# Runs all unit tests in `strings_tests.c` on your strings library
./run_tests all

# Runs all unit tests in `strings_tests.c` on the builtin library
./run_builtin_tests all
Tips for Getting Started
strings_tests.char *as any of three things: a pointer to a single character, a string, or an array of characters. These are all the same!Tips for Debugging
break,continue,next,print,x(examine), andbacktraceare particularly helpful commands for this assignment.$ make $ gdb run_tests (gdb) b test_strlen (gdb) b strlen # Run the executable with strlen as the argument (gdb) r strlenPart 2: Vectors
One common data structure which you may be familiar with is an array. Internally, arrays are just adjacent elements of the same type in memory. This allows for fast traversal of the data since iterating though the array elements is as simple as the CPU incrementing a pointer. However, standard arrays are a fixed length and cannot be grown after they have been declared. One alternative to an array is a linked list, which has no fixed size. However, linked lists are what are known as “pointer chasing” data structures. Each element in a linked list includes a pointer to the next, but none of the elements are necessarily near each other in memory.
In this part of the project you will implement a vector, sometimes refered to as an “arraylist”, which is a compromise between the two data structures. Vectors, like arrays, hold their contents in a contiguous region of memory. However, like linked lists, they can dynamically grow in size by reallocating space for their data. To avoid reallocating data everytime a new element is added, they’ll often allocate more space than the user requested.
Assignment Specification
In this part of the project, you will create your own implementation of a vector in C. Following this project, you will use vectors, as well as many other data structures defined in the C++ standard template library, for future assignments.
You have been provided with the basic structure for a vector in
vector300.h. The defintion of this struct is below:typedef struct vector300 { void *array; //pointer to a region of memory containing vector's data size_t ele_size; //size of the elements type size_t capacity; //number of elements the vector can fit size_t length; //number of elements in the vector } vector_t;Notes and Resources:
size_tdata type in C?size_t ele_size: This field allows your vector implementation to be generic!ele_sizefield will be 4.ele_sizewill be 1.size_t capacity: To avoid reallocating data every time a new element is added, your vectors will often allocate more space than the user requested. We use thecapacityfield to distinguish between the number of elements the vector dynamically allocated space for and the the number of elements the user requested (thelengthfield).vectorimplmentation and Java’sArrayListimplementation work.Capacity Doubling Example
lengthwould be 0, but the vector might allocate 40 bytes of memory for an initialcapacityof 10 ints.lengthwould be 1 but the underlyingcapacitywould remain 10.length: 10,capacity: 20)Task:
Complete the vector implementation by filling in the following functions within
vector.c. Click on each function for more details of their implementation. This portion of the project, like the last, should be implemented in C.All of the functions you are responsible for implementing is contained within
vector.c.initialize_vector: Initializes all the fields of a vector
v.type, indicates the size of the elements inv.destroy_vector: Frees a vector
This function is responsible for freeing any space within the vector
vthat was allocated. It is expected that every call tomallochas a corresponding call to free. As such, you should use thedestroy_vectorfunction to free any data within your vector that was allocated using amallocfunction.vector_size: Returns vector length
v(in units of elements).sizefunction of C++ vectors.vector_get: Returns an element in the vector at a particular index
v. A void pointer is returned to allow the vectors to be of generic type (it is expected that the caller casts the result to their desired type). The vectors are indexed into using zero indexing (meaning the first element is at index 0 and the last element is at index length-1)vector_getshould be equivalent to theatfunction of C++ vectors; failure cases should return a null pointer.vector_add_back: Adds an element to the end of a vector
v. If your vector has reached capacity, this function is also responsible for growing the vector’s array. Each time a vector reaches capacity, its capacity should be doubled.vector_add_backshould be equivalent to the c++ vectorpush_backfunctionvector_add_backimplementation will have to use memory allocation functions (such as realloc), which should be traditionally error checked. However, since your vector is meant to be modeled after the C++ vector implementation, which has no return value for push_back and will instead silently fail, it is acceptable for your vector implementation to omit error checking on allocation functions.vector_delete_back: Removes the last element from the vector
v.pop_backfunction of C++ vectors.vector_add: Adds an element to the vector at a specific index
vector_addare 0 through the vector’s current length. If the index specified is not the vector’s current length (meaning you aren’t just tacking on another element to the end of the array), the new element should not overwrite the element currently at that index. Instead, the contents of the array starting at the desired index to the array’s end should be moved so that the new element can be inserted. Once again, this function is repsonsible for increasing the capacity of the vector once the current capacity is reached.vector_addshould be equivalent to theinsertfunction of C++ vectors. Just note thatinserttakes in an itertaor as an argument to indicate the desired position within the vector while your implementation will simply use an integer to represent the desired index.vector_add. You may allow your implementation to silently fail like the c++ vector.vector_delete: Removes an element from the vector at a specific index
vector_deletefunction are 0 through the vector’s current length - 1.erasefunction of c++ vectors. Just note that, likeinsert,eraseuses an iterator rather than in integer to indicate the desired index.A Note on Pointer Arithmetic:
Recall from lecture that when you perform operations on pointers, the pointer is incremented/decremented in units of
sizeof(type)bytes.In this project, the pointers you are working with are void (meaning they have no specified type) so that your vector implementation can be generic. However, performing pointer arithmetic on void pointers will result in compiler errors since the compiler will not know by how many bytes the pointer should actually be indexed. One way to solve this is to first cast your pointer to a
char*before doing any operations on it. Once you have casted your pointer to achar*, you can then access the elements at various offsets from the pointer by adding the exact number of bytes between the pointer and the desired element.Relevant Library Functions
malloc: Allocates a block of memory
Check out the manual page: Man Page
This function allocates a region of memory of the desired size in the heap and returns a pointer to it.
realloc: Changes the size of a memory block
Check out the manual page: Man Page
ptrtosize.ptrmust be a pointer that was previously returned by another system call in the malloc family (unless it is null)free: Frees a block of memory
Check out the manual page: Man Page
ptrso that it can be later reused by the systemptrmust be a pointer that was previously returned by a function in malloc familymemcpy: Moves bytes from one region of memory to another non-overlapping region
Check out the manual page: Man Page
nbytes from the region of memory pointed to bysrcto the region pointed to bydestmemcpy, the regions of memory indicated bysrcanddestcannot overlapmemmove: Moves bytes from one region of memory to another
Check out the manual page: Man Page
memcpy, this function movesnbytes fromsrctodest. However, formemmove,srcanddestare allowed to be overlapping regions of memory.Compile, Run, Test
The Makefile
makecommand. This will create the testsuite executable to be used to run tests../testsuiteormake checkTesting
This test suite compares your vector implementation to the C++ standard library vector (
std::vector). When your implementation is fully functional, the testsuite executable should print nothing out besides your point total.Upon test failure, the testsuite prints out the expected state of the vector versus your vector. This output, in addition to the use of
gdb, should help you track down and fix your errors. Additionally, the Makefile compiles the vector code with an address sanitizer. As such, you will get warnings if your implementation has any memory leaks or errors. A fully functional implementation should show no error output from the address sanitizer while it’s running.Extra Credit: Encoding Detector
Often you or your programs may need to know the character set used in a file in order to interpret it. Linux actually provides a utility to do this that you may be familiar with, the
fileprogram:As an extra credit assignment, you will have the opportunity to implement your own file encoding detector!
Extra Credit Stencil
All of the code for the extra credit can be found in the directory
extra-credit. This directory contains the following files:file.cdetect_encoding()function which will return the character set used in a given file.encoding_testsMakefilefile.cinto thefileexecutable. Check out theCompile and Runsection below for more information.Assignment Specification
For this part of the project you will be implementing your own
fileutility (infile.c). Given a file as input, yourfileimplementation should print out whether the given file is encoded using ASCII, UTF-8, or neither (undefined). Feel free to research other character sets to detect in your implementation; however, only ASCII and UTF-8 are required.Task: Implement the the function
detect_encoding()infile.c.detect_enocding()should returnASCII,UTF-8, orUNDEFINEDbased on the encoding of the provided fileASCIIshould only be returned if ALL of the bytes in the input file are valid ASCII charactersUTF-8should only be returned if ALL of the characters in the input file are valid UTF-8UNDEFINEDshould be returned if neither of the above are trueRelevant Library Functions
For this part of the assignment, you will have to be able to read input from files. You may find the below functions useful in doing so.
open: Opens a file
Check out the manual page: Man Page
This function opens a file designated by
filename, with the mode indicated byflags. For the assignment, you only need to read from pre-existing files, which can be satisfied with the flag valueO_RDONLY.openreturns a file descriptor (an integer), which may be used to reference the opened file in other functions.close: Closes a file
Check out the manual page: Man Page
This function closes the file refered to by the file descriptor
fd. The return value indicates if the function call succeeded (0) or failed (-1).read: Reads bytes from a file
Check out the manual page: Man Page
This function reads at most
nbytes from the file refered to byfdand stores them inbuf. The return value indicated the number of bytes read (which will be no more thann).readreturns 0 if the end of the file is reached, and -1 if an error was encountered.Compile, Run, Test
The Makefile
makecommand. This will create thefileexecutablemake checkTesting
The command
make checkruns yourfileutility against all our test files. Feel free to create more files to test your encoding detector as needed.Stretch Goal (hard!)
If you feel adventurous, try to make your
fileutility produce the same output as the Linux utility, which prints additional information about files (e.g., whether they contain C source code, or what kind of executable they are).You can go very deep down the rabbit hole here (e.g., to quite literally look into magic 🪄), but a reasonable attempt would match the output for simple text files and source code.
make check-stretchwill compare yourfiletool to the Linux one.Handing In Your Code
You will hand in your code using Git. In the
strvec/subdirectory, you MUST fill in the text file calledREADME.md. TheREADME.mdfile will include the following:Grading breakdown:
stringandwchar_tfunctionality (the test programs we hand out, plus others). If running./run_testsreports that 100% of tests pass, you’ve probably got all these points.vectorfunctionality. If runningmake checkreportsTotal score: 20 out of 20, you’ve probably got all these points.README.md.Your submission will not be graded until you configure grading server. You should have used the grading server for Lab 0 already.
If you were registered for CS 300 on the first day of classes, you should have received credentials by email.
If you only recently registered or you’re shopping the course but haven’t registered, you won’t have an account yet. In that case, please complete this form and wait until you receive your credentials. We will create accounts based on the form entries at 8pm every day.
Step 1: Log into the grading server with the password you received. Once you’re logged in, enter your GitHub username (at the top).
Step 2: Add the repository URL under the “Strings and Vectors” category. Click “Strings and Vectors” to initiate a fetch of your repository from GitHub.
Note: If your GitHub account is not linked to your Brown email address, the grading server will give you a command to run to verify your project repository.
Step 3: You should see your commit listed on the Labs page, as shown above. You can use the buttons below the commit list to test your code in our grading environment. Make sure it still passes all the tests!
Congratulations, you’ve completed the first project!
Acknowledgements: We are grateful to Brown’s CS 33 course for providing the basis for the strings portiton of this project. The vectors and mbslen portions were developed for CS 300.