You have seen planning in other domains all your life: floor plans in construction, the multi-year schedule of courses you need to graduate. Any time you have used a to-do list to organize your approach to a big project, you have made and used a plan.
A plan articulates the high-level structure of your solution to a problem. It says what steps need to be taken and what order they have to happen in, if any. Its value is that it lets you check your solution against the instructions and the constraints before you invest a lot of work in any one step — whether that step is building a wall, taking a course, or writing a function. Then, as you work, the plan is what you look back at to see whether you are still on track.
Plans are also for communicating. Architects and construction teams share plans so that everyone agrees on what is being built before it is built; programming teams do the same. In this course we ask you to write plans both so that you have your own steps laid out and so that you can show your intended steps to a TA. Given a written or drawn plan, a TA can help you work out whether the trouble is in your code or in your plan — which are very different problems with very different fixes.
Note: These plans are not code. They are a higher-level overview of your solution, and it is fine for one step of a plan to become several lines of code. If you find yourself listing more than a handful of steps, look for a way to bundle some of them together. Those bundles are often exactly the helper functions that will make your code cleaner to read — and you may want to plan those helpers too.
Styles of Plans: Concrete Examples
There are many ways to write plans. Here we show two basic styles; feel free to adapt them or invent your own.
Problem Statement: Assume a school where every student is assigned an advisor based strictly on the semester they are in. We have a table of students and a table of advisors. We want to perform two tasks:
- Task 1. Given a student name as input, determine that student's assigned advisor.
- Task 2. Extend the student table to also show each student's advisor.
See the Students table
| name | semester | SNC | quiz1 | quiz2 |
|---|---|---|---|---|
| Ursa | 3 | FALSE | 83 | 56 |
| Isaias | 4 | TRUE | 92 | 79 |
| Jackson | 8 | TRUE | 61 | 0 |
| Isi | 7 | FALSE | 90 | 87 |
| Thuy | 5 | FALSE | 85 | 85 |
| Brigida | 5 | FALSE | 0 | 0 |
See the Advisors table
| sem | name |
|---|---|
| 1 | Pan |
| 2 | Greene |
| 3 | Greene |
| 4 | Rodriguez |
| 5 | Pan |
| 6 | Pan |
| 7 | Rodriguez |
| 8 | Greene |
Style 1 — structured text
Part 1
- Find the row in the student table that matches the given student
- Extract the semester from the row
- Find the row in the advisor table that matches the extracted semester
- Extract the advisor name from the row
Part 2
- Build a column. For each row:
- Extract the semester from the row
- Find the row in the advisor table that matches the extracted semester
- Extract the advisor name from the row
Notice that the inner three steps of Part 2 are the last three steps of Part 1. That repetition is visible in the plan, before either part is written, and it is the sort of thing that tells you a helper function is worth having.
Style 2 — shapes
The same two plans, drawn. Boxes are steps, arrows are values flowing from one step to the next, and the inputs to the whole computation sit across the top.
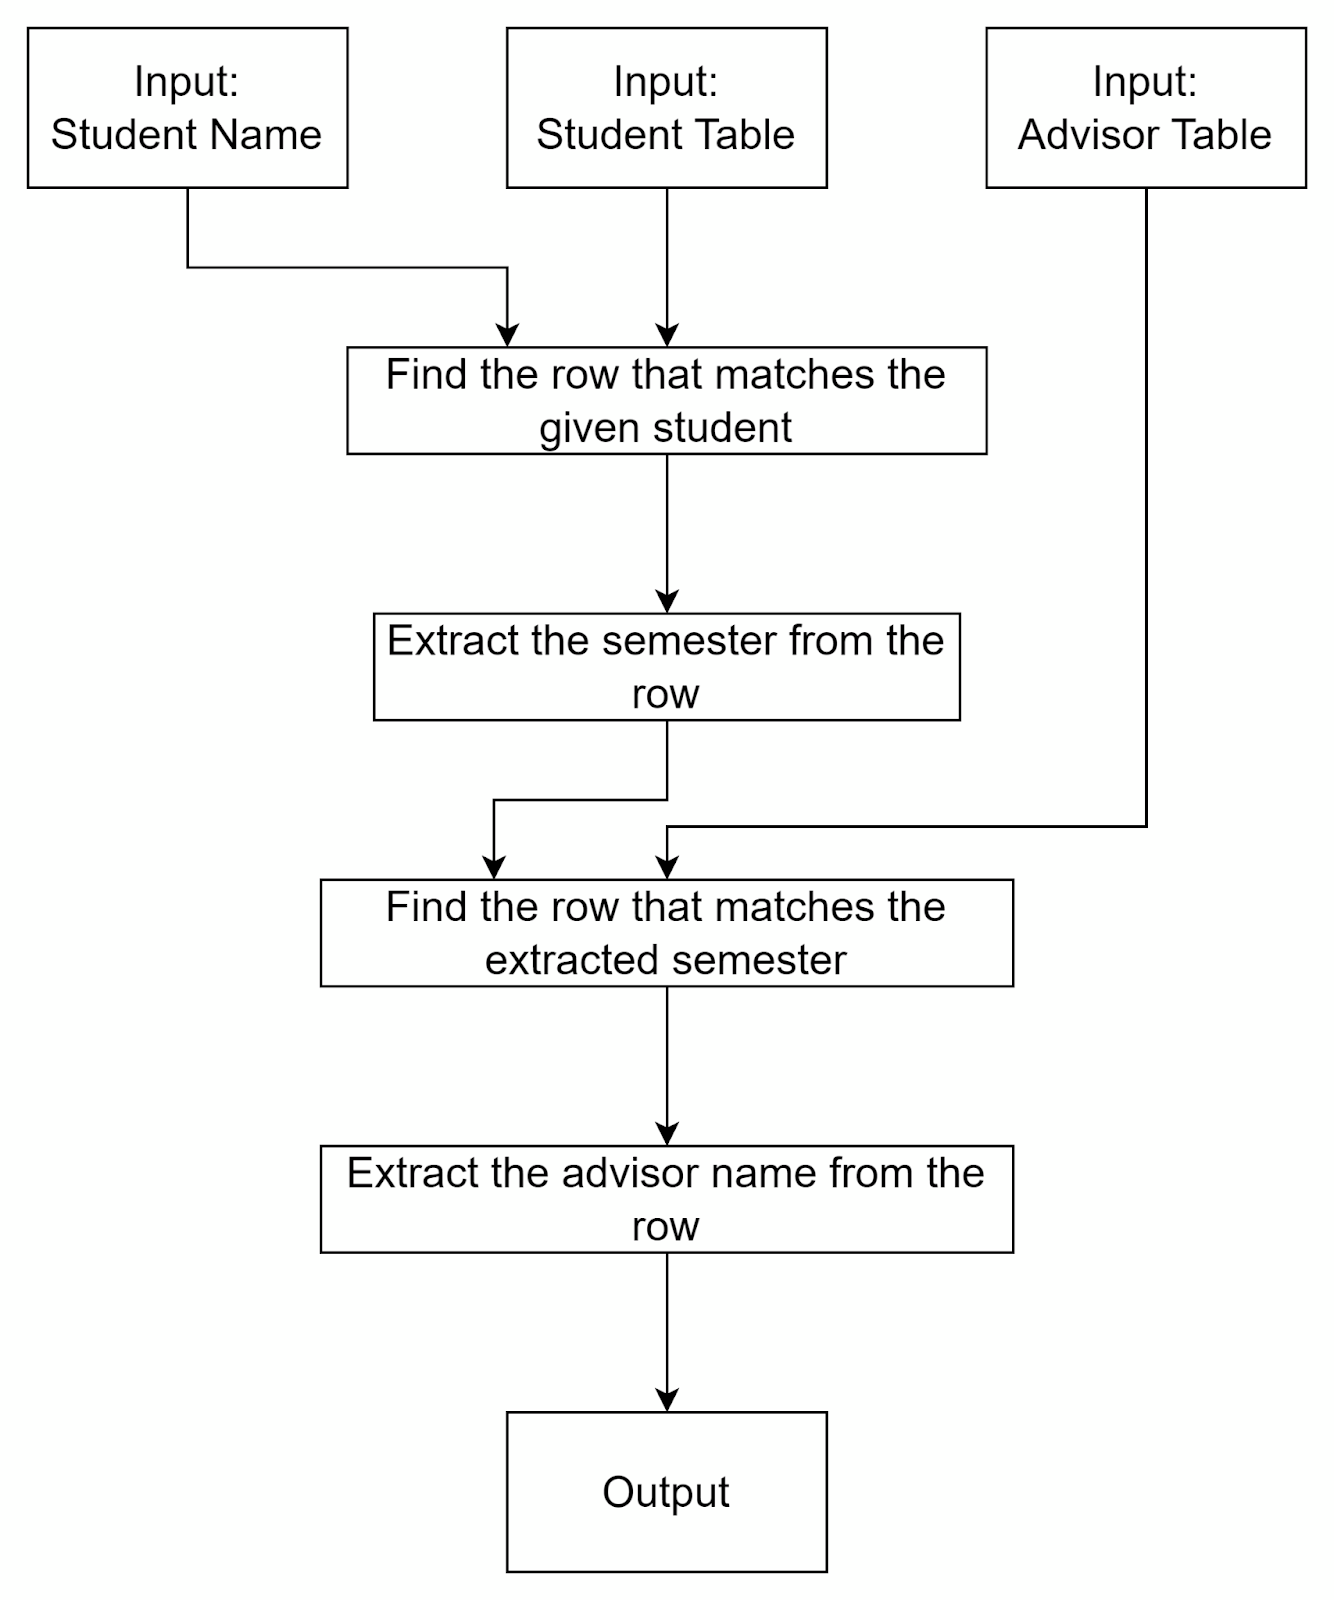
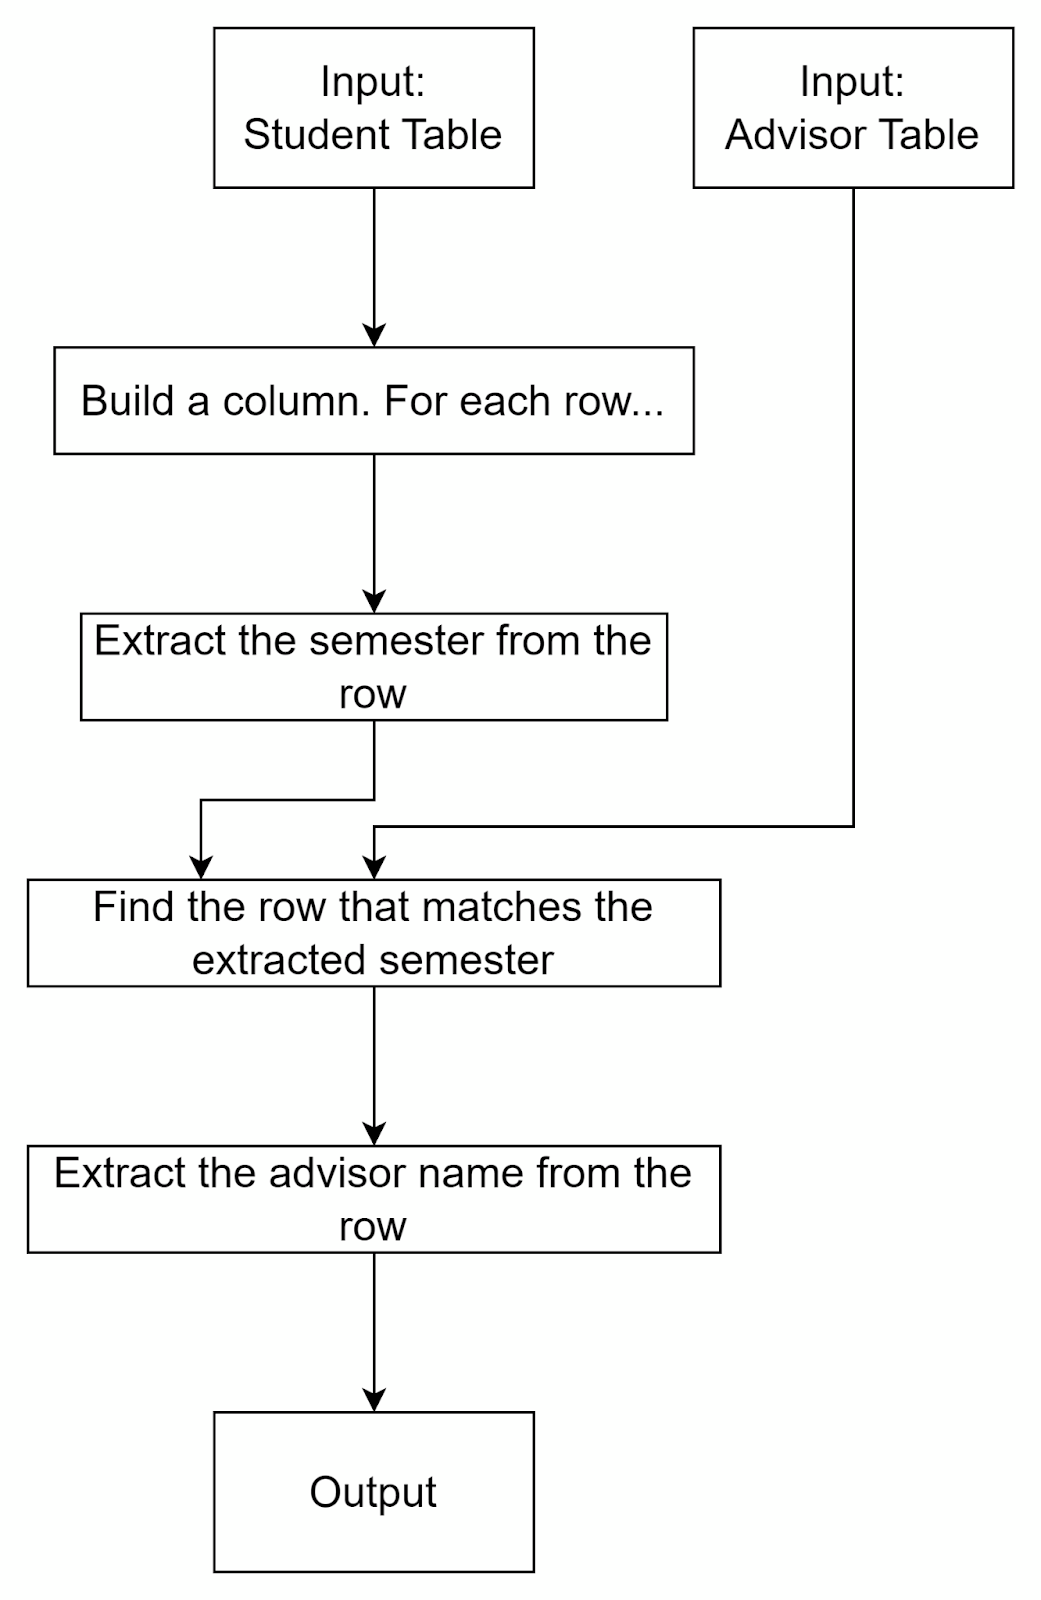
The drawn form makes the data explicit in a way the text form does not: you can see at a glance that the advisor table is not needed until the third step, and that Part 2 never uses a student name at all.
Including other information
Put anything else in your plan that makes it clearer to you or to a reader. Some things worth adding:
- Type information. In Style 1, that might read "the extracted
value is a
Number". In Style 2, it is a label on an arrow. - Names for the outputs of particular steps. In Style 1: "we will
call this value
student-semester". In Style 2: a name on the arrow. - Properties that must hold at a point in the plan. In either style: "after this step there will be exactly one advisor".
These mix freely — an arrow can carry both a name and a type, student-semester :: Number. What matters is that you and anyone reading the plan can understand it.
A property written into a plan is often a test waiting to be written. "After this step there will be exactly one advisor" is a claim you can check, and the Guide to Testing Plans picks up this same problem to show what a testing plan for it looks like.